Sunday, 29 November 2015

Broccoli and Blue Cheese Soup and Optimum ThermoCook REVIEW

It's been a very exciting week in my kitchen so far; I've been busy playing with my new toy... This fabulous ThermoCook!

I am so excited to welcome this beast into my kitchen army! Can't wait to put it through its paces. #Optimum #ThermoCook @froothieuk (and yes that is my phone and jumper you can see in the pic. Oops! 😱)
A photo posted by Kevin Chambers-Paston (@thecraftylarder) on
Loved this frothy, delicious white soya hot chocolate made in my new #Optimum #ThermoCook 50g White Chocolate, 250g Soy Milk. Whizz at 80°C for 4mins. Yum!
A photo posted by Kevin Chambers-Paston (@thecraftylarder) on

Looking like a cross between a kettle and a food processor, I guess it's a bit of both but oh so much more than that. It chops, purees, liquidises, heats, stirs, mashes, steams, boils and everything in between. Already it's become my 'right-hand man' in the kitchen as it gets on with kitchen jobs I don't want to do and it doesn't even moan about it; rather, it purrs gently on the countertop. It is a joy to use, relatively simple to clean and has proved to be a really useful addition to the kitchen arsenal already.

I haven't used it to its full potential yet and I'm still learning what it can do, but I'll be sharing my recipes with you as I go along. I've already found out it makes the BEST hot chocolate EVER and also makes a splendid soup rather quickly and simply.

I'm a Froothie Ambassador for the ThermoCook which means I will be trying to show you all how to get the very best from these little machines so do stay tuned for a bit of crafty innovation from me!


Yes, that is a poached egg floating in the soup because, well, why not? Almost all soups are improved with a floating eggy island and this one is no exception. Also, I'm always conscious when a meal is meat free to try to include some protein so the cheese and egg are a good combo for that.

When you see the recipe, you won't believe how simple it is. It's barely even a recipe, really, but then all my favourites are like that. I like simple.

print recipe

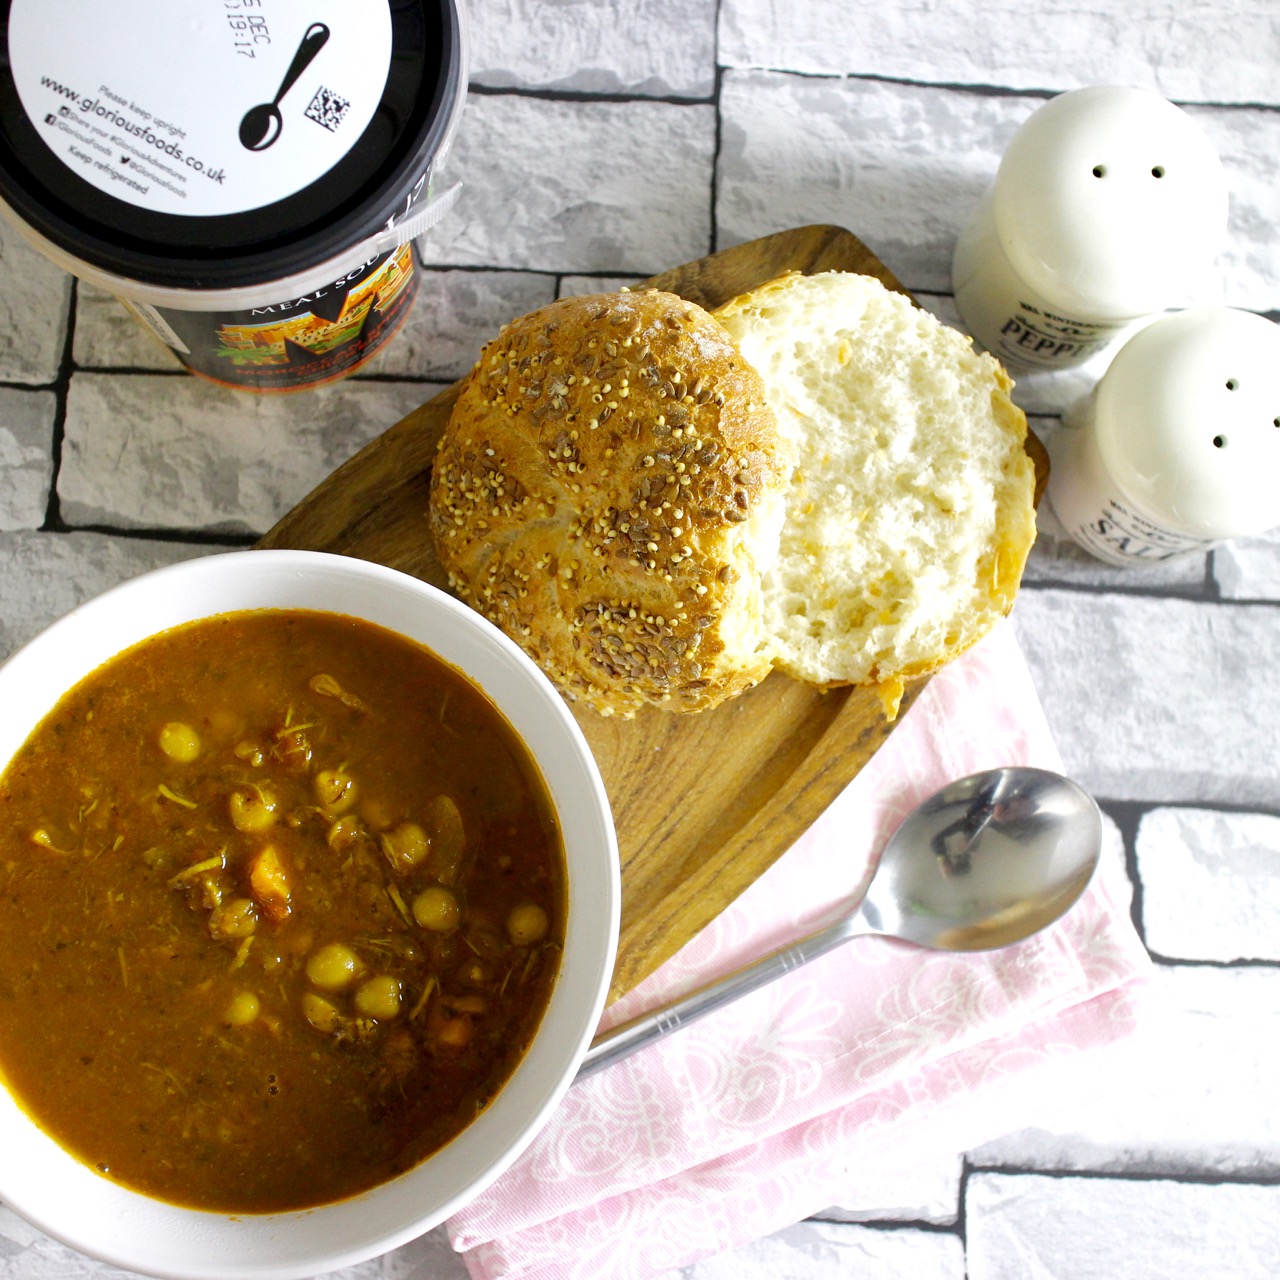
Broccoli and Blue Cheese ThermoSoup
A 'chuck it all in and forget it' soup that is made even easier by using a ThermoCook to do all the work for you.
Ingredients
  • 1 medium head of broccol, florets only
  • 1 medium onion
  • 1 medium potato
  • 500ml vegetable stock
  • 50g blue cheese
  • 2 medium eggs
  • A few splashes of tabasco sauce
Instructions
1. Chop the broccoli, onion and potato into 1-2cm pieces and place into the ThermoCook jug fitted with the standard blades, along with the stock. 2. Choose the 'Quick Soup' setting for 15 minutes and leave the machine to do its thing. 3. In the meantime, poach the eggs according to your preferred method. You want to try to time them to be perfect around 1 minute after the soup is done. 4. When the soup is done, the ThermoCook will beep at you. Crumble in half of the blue cheese and process on the 'Smoothie' setting until perfectly smooth. 5. Serve alongside a stack of fresh bread, with the egg floating in the soup. I like to garnish with a few splashes of tabasco sauce and a good grinding of black pepper, but you can leave these out if you like. I'll let you, just this once!
Details
Prep time: Cook time: Total time: Yield: 2 servings


If you'd like to know more about the ThermoCook and how it can help you in the kitchen this festive season, please do hop over to the Froothie website and take a look. If you have any questions, feel free to email me or drop a comment on this blog post and I'll reply as soon as possible.

For more ThermoCook goodness from my fellow Ambassadors, check out these posts:


Disclaimer: I am a Froothie ambassador because I think their products are awesome! This post contains affiliate links and a commission is earned if you buy using those links. They also sent me the ThermoCook to review and produce my recipes.

Sunday, 22 November 2015

Sausage and Ale Cassoulet

What's better than a sausage casserole on a Sunday evening? A sausage casserole with ale, of course!


You may remember back in October I wrote about Crocktober with my Bakewell Macaroni Pudding. Well, as part of the ongoing celebration of all things slow-cooked, Crock-Pot challenged me and a few fellow bloggers to come up with a collective recipe. All we had to do was submit one ingredient each and then cook a recipe with all the selected ingredients included. It could have been a complete recipe for disaster but actually turned out pretty tasty!

When it came to me, two other bloggers had already chosen sausages and chopped tomatoes. Seeing those two, I added butter beans as I just love these in a stew, particularly with a tomato base. Altogether, there were 8 ingredients chosen:
  • Chopped Tomatoes 
  • Sausage 
  • Butter Beans 
  • Kale 
  • Ale 
  • Butternut Squash 
  • Sweet Potato 
  • Onion

Crock-pot did supply a recipe using all of these which was a kind of stew topped with sweet potato mash. However, I thought it would be better to make a stew with a couple of side dishes rather than a one-pot dish with so many ingredients. When slow cooking, the flavours really mingle with each other and sometimes it's nice to have a side with its own distinct flavour.


I made sweet potato colcannon with the addition of the kale and some garlic-roasted butternut squash as the two side dishes, so that left 5 ingredients for the stew! So, how did I make it? Simple!

print recipe

Sausage and Ale Cassoulet
A stew that matches sausages with the lovely flavour of ale. A classic 'set and leave' slow cooker meal perfect for a lazy Sunday.
Ingredients
  • 6 good quality sausages
  • 1 large onion, finely sliced
  • 1 tin chopped tomatoes
  • 1tbsp tomato purée
  • 1tsp smoked paprika
  • 1 fat clove garlic, minced
  • 2/3 sprigs thyme (I used lemon thyme as it grows in my garden!)
  • 200ml ale
  • 1 tin butter beans
  • 0.5tbsp cornflour
Instructions
1. Sear the sausages in a hot pan with a little oil until browned on all sides. Remove from the pan, chop each sausage into 3 pieces and place into the Crock-Pot without any of the fat that comes out of the sausages. 2. Toss the sliced onion into the pan and fry for a few minutes until the edges are tinged brown, then add to the sausages. 3. Place all of the remaining ingredients, except the butter beans and cornflour, into the Crock-Pot and mix well. Set on high and leave for at least 5 hours, stirring every couple of hours (not essential but helps to stop the edges sticking.) 4. 1 hour before serving, drain and rinse the butter beans before stirring into the stew. 5. Check the stew half an hour before serving. If the sauce needs thickening, mix the cornflour with a little water then pour into the stew. Stir well and then turn to high for the last 30 minutes. 6. Serve in the middle of a ring of sweet potato colcannon, topped with garlic-roasted butternut squash and enjoy!
Details
Prep time: Cook time: Total time: Yield: 2 servings, with some leftovers


Recipes for the sides will be posted in the coming weeks!


For other interpretations of the recipe, have a look at these posts by other bloggers:

As always, I'd love to hear what you think of this recipe in the comments below. I am also always delighted to see pics when someone makes one of my recipes so please do show me on Twitter, Facebook or Instagram if you do! The links are in the bar to the right.

Disclaimer: This recipe post was commissioned by Crock-Pot, who also sent me a slow cooker to use. As always, I wasn't expected to write a positive review and all views expressed are my own personal opinions.

Wednesday, 18 November 2015

REVIEW: Glorious! Moroccan Spiced Chicken Soup

As I sit down at my dinner table, I start to hear the murmur of people shuffling around a busy souk; bartering for goods and shouting out to one another. The smell of fruit-laced shisha smoke fills my nose and a sense of relaxation descends. Am I on holiday? Nope!

You see, I recently tried Glorious! soups for the first time and the taste of their Moroccan Spiced Chicken Soup instantly transported me back into my memories to find the nearest point of reference; Tunisia. You see, I've never been to Morocco but whenever I think about it, I think it must be like Tunisia. It may not be alike at all, but it's funny how minds work isn't it?

Glorious! have made a massive effort with their new range of fresh soups to make sure the recipes are as authentic as possible and evoke memories or fantasies of travels in the place where the soup originates. I tried the Moroccan Spiced Chicken Soup and I was hooked immediately!

Glorious! call this a 'meal soup' and I can really see why! Not only is it packed with lovely chicken, it also includes chick peas and cous cous to turn this into a really thick and satisfying soup that's more like a stew in texture. I had this for dinner and I was completely full. Sure, I did eat two servings but when it's this delicious and relatively low calorie, why not?!

I have a bit of an aversion to anything sweet in a savoury recipe and I'll admit my heart sank when I got home and read on the back of the tub that this soup contains dried apricots (ick!) However, if I'm honest I couldn't really taste them in the soup. There certainly didn't seem to be any lumps of apricot so if anything they just added a subtle sweetness that went really well with the nicely spiced soup.

Are you a blogger? Fancy winning a holiday to Mumbai?
This blog post is an entry into the Foodies100/GLORIOUS! soup #GloriousAdventures blogger challenge.

The maker of these delicious soups has teamed up with Foodies100 to bring a competition to all bloggers. For more details, check out the Foodies100 website. Good luck!


Disclaimer: This post has been commissioned by Glorious! Foods. I wasn't expected to write a positive review and, as always, all opinions expressed are my own.

Thursday, 12 November 2015

REVIEW: Ibis Heathrow

A little while ago, at the end of September, I attended a fab food blogger conference called Food Blogger Connect down in London. It was a full 3 days of great food, talks about various aspects of blogging and, best of all, meeting lots of other food bloggers I've only spoken to online before.

Being down in London, it was shaping up to be quite an expensive affair with the ticket price, transport and hotel. Luckily for me, the lovely people from Ibis offered me a room for two nights at the Ibis Heathrow. Perfect! In return, I agreed to review my stay there which overall was pretty good...

First Impressions
The hotel looked lovely from the outside and also in the reception. Really clean and bright and the staff all seemed really lovely. No complaints from me on that front.

However, one thing that I do need to point out is that the location of the hotel is not ideal if you need to get there by tube. It's quite far from the nearest tube station and requires quite a walk. Not good if you were carrying a big case with you as I was. Luckily for me, the lovely Becca from Amuse Your Bouche was driving so I was able to get a lift there; hooray! 6/10

The Room
My room was really rather nice. Completely clean and recently refurbished I'm sure, it was all I want from a hotel room. A lovely big, high bed and plenty of pillows too.


As a lovely little touch, the hotel left out some water, a bowl of fruit and a hand-written card. I thought this was lovely! I'm not sure this is included in a standard room, but you can probably pay for the upgrade. I felt very valued.


The bathroom was quite small and only had a shower. This was fine for me, but I know some people do like to soak in a hotel bath so worth checking with the hotel if that's important for you. The bathroom did look very lovely though, even if I did manage my usual trick of sloshing water all over the floor whilst showering.


I couldn't really think of any complaints with the room at all. I'd definitely recommend it for those who like a little touch of luxury whilst still on a budget. 9/10

The Food and Drink
I didn't get to sample much of the food in the hotel. The schedule meant I missed breakfast on both mornings, but I did have a really lovely evening meal of nachos and a caesar salad. The portions were massive (the salad is a SMALL!) and the prices really reasonable. Not amazing food but perfect for a hotel of this type, in my opinion. 6/10


Value For Money
As with all hotels, prices do vary according to demand and time of the year. I think when I stayed the average rate was around £40 per night which I think is amazing value for a room of this quality in/around London! 9/10

Overall
I did enjoy my stay at the IBIS Heathrow and would definitely stay there again if I needed to be in the specific area or perhaps was flying from Heathrow. However, for those who need to be in central London or who enjoy a night out in the city there are much better placed hotels. All in all, I'd give this a respectable 7.5/10

Disclaimer: I was given a free stay at the IBIS Heathrow in return for writing a review. I was not expected to write positive comments and, as always. any opinions expressed are my own.

Tuesday, 10 November 2015

Diet-Friendly Eggnog

So, the big 'C' word is not that far away now. Starbucks have revealed their red cup design to much controversy (seriously, some people will moan about ANYTHING!) and I'm starting to think about festive recipes.

One of my favourite festive drinks is a good old eggnog latte, but a lot of eggnog you can get hold of in this country is really high in calories. So, I set out to see if I could make some myself that won't break my diet. I'm pleased to tell you it worked!


Doesn't it look just so creamy and inviting?! Many of the recipes you'll find online will contain full fat milk and more than likely double cream too! Delicious ingredients, but not ones I'll eat every day when I'm trying to be good. My recipe uses skimmed milk, eggs, vanilla and a little nutmeg. That's it! So tasty and yet positively angelic too.

As I said, I love to turn this into a latte (and I'll show you how I do it very soon!) but I also love to drink this just as it is. A delicious, milky drink with added protein from the eggs. Delicious.

I used my Froothie Optimum 9400 high-speed blender to make this eggnog. It spins around so quickly that the friction from the blades will heat the milk, cooking the eggs in the process and making the eggnog lovely and frothy. If you don't have a high-speed blender then you should definitely look at my link and think seriously about buying one of these wonderful machines. However, if that's not an option then you can cook this eggnog in a pan stirring constantly until cooked through.

To make this eggnog extra special and very adult, just add a slosh of your favourite booze. Personally, I love this with rum or amaretto but I'm sure lots of other alcohol will work too. You could also sweeten it with 1tbsp sugar or a drop of honey, agave etc; I don't think it needs it but then I don't have a particularly sweet tooth!

print recipe

Diet-Friendly Eggnog
A lovely creamy eggnog, with all the flavour and much less of the calories.
Ingredients
  • 500ml/2 cups skimmed milk
  • 2 medium eggs
  • 1 small splash vanilla extract
  • freshly grated nutmeg, to taste
Instructions
1. Place all the ingredients into the Optimum 9400 and turn on to high. 2. Blend for around 5 minutes or until piping hot and slightly thickened. The milk froths up a large amount because of the low fat content and some of that froth may try to escape the top of the blender. If this happens, just switch off, wipe and resume blending. 3. Serve immediately or leave to cool and store in a sealed container in the fridge.
Details
Prep time: Cook time: Total time: Yield: 4 servings (approx)


Disclaimer: I am a Froothie ambassador because I think their products are awesome! This post contains affiliate links and a commission is earned if you buy using those links.

Wednesday, 4 November 2015

GIVEAWAY: Cheese Posties and Club Sandwich Challenge


Do you LOVE a cheese toastie? I don't think I know anyone that could say no to that question. I love cheese, love good bread and love interesting fillings. So when I first heard about Cheese Posties, I couldn't wait to give them a go!

The idea is simple. They send you a box with everything you need to create a delicious toastie; even down to providing a toastable bag to put it in. Just add a toaster and you'll be getting cheesy in no time.

They have worked really hard to create some winning flavour combinations that go beyond just cheese in bread and there are even sweet versions too. Veggie Lasagne, Strawberry Shortcake and Chilli Con Queso all feature on the 'Cheeseboard'.

The first toastie I tried was the Veggie Lasagne and I was very impressed. All ingredients were great quality and it was really easy to assemble. The only comment I had is that I would have liked either more of the marinara sauce or a more concentrated version as the flavour was lost easily in the sandwich. I followed this with a Strawberry Shortcake in some delightfully toastie-filled mealtime fun. This one was just delicious and I could have eaten more and more!


So, now that you've seen how great these are, how would you like a chance to win 4 of your very own toasties?! That's right, I've been given one prize of a toastie each week for a full month to give away to one lucky winner. All you need to do is enter using the widget below. Good luck! Please note: Entry is open to UK Residents ONLY and commenting on this blog post is mandatory.

a Rafflecopter giveaway
Disclaimer: I received some Cheese Posties to review. As always, I was not expected to write a positive review and all opinions are my own.

I assume you're reading this post because you like sandwiches? If that's true, I'd love to introduce you to a new blogger challenge I'm running with Stuart of Cakeyboi called Club Sandwich!


For Club Sandwich we would love to see all your sandwich combinations. Be they proper sandwiches or toasties, Paninis, bagels, sweet or savoury, healthy or not - you name it we shall accept it! It doesn't even need to be in bread - I once saw Paula Deen make a sandwich with doughnuts as the 'bread'! Be creative as you like.

All you have to do is follow the simple rules below;
  • Add your sandwich to the Linky at the bottom of this post by the 25th of the month, midnight at the latest.
  • Post the sarnie onto your blog and link back to Cakeyboi and The Crafty Larder, stating who is hosting this month.
  • Follow Cakeyboi and The Crafty Larder blogs on Google + (see sidebar links), if you haven’t already.
  • If you tweet use  #clubsandwich and mention @MrCakeyboi and @thecraftylarder - we will retweet 
  • Add the challenge logo to the post and ‘Club Sandwich’ as a label to the post
  • Use any recipe as long as the source is noted
  • Feel free to enter old posts as long as you update the post and meet all the requirements above!

Tuesday, 3 November 2015

Super Simple Tea Loaf

A couple of days ago, I was asked if I'd like to create a recipe using Clover spread. Given that Clover is already my spread of choice, I jumped at the chance! This'll be an easy one, I thought; but how do I show the flavour of Clover off to its full potential?

After a bit of chin-scratching, I decided to keep it really simple with a lovely tea loaf spread with lashings of Clover which would allow the great flavour to come through.

The term 'tea loaf' is one that I think is a bit confusing... Is it a loaf made with tea? Or a loaf that's perfect to drink with tea? Well, the truth is either or in this case BOTH! The important thing is that it has something to do with the ritual of afternoon tea and that's good enough for me.

You'll notice this recipe contains no fat and no eggs either... This is quite unusual but it does mean the loaf will keep really well without going stale. I've kept this loaf for a week before with no problem at all.


It's also a really forgiving and adaptable recipe. You can play around with it until you get something that suits you. Feel free to use different fruit - I've used some morello cherries in mine as I wanted to use them up! You can also use whatever sugar is in your cupboard and it will still be very tasty. I have even swapped the tea for coffee and added some walnuts into the mix. Delicious!

The Clover adds a beautiful buttery flavour to the cut loaf and I can rest assured as I know it contains no artificial nasties whatsoever! It's also made from buttermilk, which means it contains half the saturated fat of butter and is a great ingredient to use in healthy family meals.


print recipe

Super Simple Tea Loaf
This tea loaf is unbelievably simple yet so very delicious. Jam packed with fruit and best served with lashings of butter and a strong cup of tea.
Ingredients
  • 1 cup mixed dried fruit
  • 1 cup hot, strong black tea
  • 3/4 cup light muscovado sugar
  • 2 cups self-raising flour
  • 1 tsp mixed spice
  • For the glaze:
  • 1tsp sugar
  • 1tbsp boiling water
  • 1 pinch mixed spice
  • To serve:
  • Lashings of Clover
Instructions
1. Pour the tea over the fruit and leave to soak until completely cold. I leave the teabag in, to make sure the tea is as strong as possible. Whilst the fruit is soaking, preheat the oven to 160ºC. 2. Stir the light muscovado sugar, flour and mixed spice into the fruit and tea until thoroughly combined then spoon into a lined or greased loaf tin. 3. Bake for 50-55 mins, or until completely cooked and a golden brown. I like to turn it half way through; it won't collapse like a cake if you open the oven. 4. As soon as the loaf is out of the oven, combine the ingredients for the glaze and brush all over the top of the loaf to achieve a beautiful, rich sheen. 5. Remove from the tin and leave to cool completely. 6. Slice and serve spread with lashings of Clover.
Details
Prep time: Cook time: Total time: Yield: 1 tea loaf


I hope you try and love this tea loaf! Any questions or comments? Let me know in the comments box below.

Clover would also love you to pop over to their Facebook page, where you can win personalised fridge magnets by sharing pictures of your dishes made with Clover. Good luck!

Disclaimer: This post was commissioned by Clover. As always, all views expressed are my own personal opinions.
"; n.innerHTML = at; container.insertBefore(n , footer); } } return true; }; document.doAT('hentry');
Related Posts Plugin for WordPress, Blogger...

Other interesting websites