I've tried my hand at many crafts in the past. Some were more successful than others but one craft I enjoyed more than most was making candles and wax melts. I even sold them for a while!
I have put together a series of short guides on working with wax, so that you can explore this craft too. First, I will give you a brief introduction to working with wax, then we'll move on to making simple wax melts. Finally, I'll show you how to make container candles.
Scented wax items make fab christmas presents for family and friend and with my guide you'll have those gifts sorted in no time!
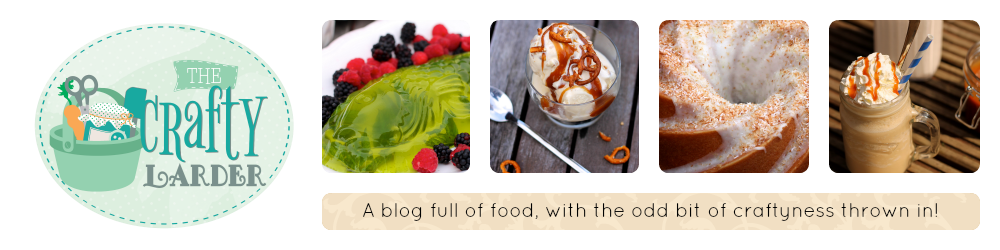
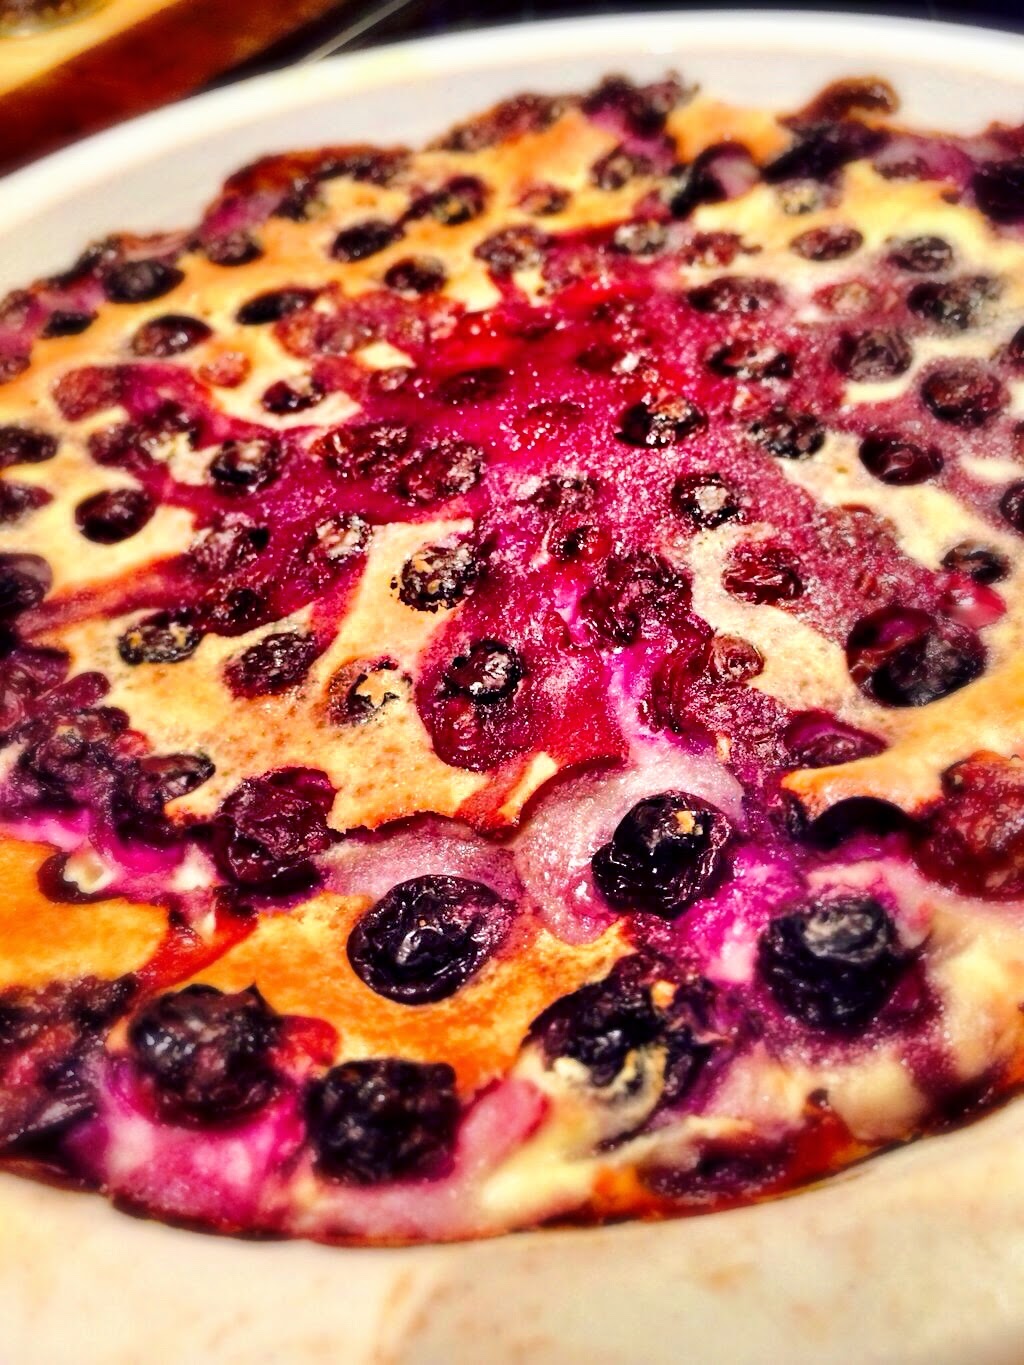
A clafoutis is a really versatile dessert, perfect for using up any leftover fruit lolling around at the bottom of the fridge. Most of the ingredients are those you are likely to have in your cupboard/fridge all the time so a clafoutis can be whipped up and put in the oven in no time at all. (and guests will be really impressed with the French name, thinking you are a domestic god(ess) too!)
I like to think of it as a cross between a yorkshire pudding and a pancake with fruit but I'm not sure France would be too happy with that... You see, it's origins are in France, where it would traditionally be made with black cherries.
I've made this one with blueberries and almonds, but you could use anything you like; just replace the ingredients with those you have available. For example, raspberries and white chocolate would be delicious and very indulgent or perhaps gooseberries and ground ginger for a very grown-up version.
This recipe makes enough for 3-4 people, but you could multiply the quantities and timings to make more or less. I used a 19cm wide ceramic dish to bake mine in but again, use whatever you have. A cake tin is not really a good idea though; the batter is quite liquid and it might leak; don't ask how I know !!!
print recipe
Blueberry & Almond Clafoutis
by Kevin Chambers-Paston September-21-2014
A fab dessert for using up any leftover fruit. Change the blueberries and almonds for whatever you fancy!
Ingredients
200g blueberries
50g plain flour
150ml milk
2 eggs, medium
2 tbsp ground almonds
50g sugar
1 tsp almond extract
Instructions
1. Grease an oven dish lightly, then scatter the base with the blueberries.2. Put the remaining ingredients into a jug and beat until it comes together into a runny batter with no lumps. Pour over the blueberries.3. Bake in the oven at 180ºC for 20-30 mins or until puffed up and golden brown.4. Leave to stand for a few minutes then dust with icing sugar and serve warm.
Details
Prep time: Cook time: Total time: Yield: 3-4 servings
I am entering this dessert into the following challenges:
Dead Easy Desserts with Maison Cupcake and Elizabeth's Kitchen Diary
There's something about foraging and getting food for free that really appeals to me. It's not just that it's free and delicious, but there's something about it that feels really natural; my ancestors no doubt would have been foraging for their food so it's good to get back to that and enjoy these treats for myself!
We went foraging with Chris's Dad on Sunday and just look at our bounty... Blackberries, sloes, rosehips and crab apples were all aplenty and ours for the taking; and take them we certainly did. The hedgerows seem particularly heavy with fruit this year, so I don't feel bad about taking a few berries away from the birds; I always leave plenty of the smaller ones on the bushes for them to enjoy anyway.
So, once we'd been out and picked them I then had to decide what to do with them... I think my little trip to Scotland last week may have had more of an impact on me than I'd realised when I decided I would use some of the blackberries to flavour a bottle of scotch whisky.
I haven't made this before, but I'm told it's incredible. Even those who don't really like whisky will love this, either neat or with a little apple juice. I'm hoping that's true but I will have to wait a few months to find out myself. I scoured the internet and found so many different recipes for the whisky, so did what I usually do in this situation and combined them all to make my own recipe. I'll let you know how it turns out in a few months!
I use a Kilner jar for this recipe. Wherever possible, I try to stick with Kilner as my brand of choice and you will notice that when you look at previous posts on this blog. There are a number of reasons for this - not least the fact I can always be assured of a quality item when it carries the Kilner name. I know that it's going to do the job well and, importantly in this recipe, I know the seals will be air (and whisky!) tight, so nothing will get in or out of the jars unless I want it to.
You'll want a reasonable whisky for this recipe. It doesn't need to be a fancy single malt, but at the same time you don't want to use a stomach-burning value brand either. I've gone in the middle of the two with the Queen Margot whisky from Lidl.
This is so simple, I am almost ashamed to call it a recipe but here it is for you anyway...
print recipe
Blackberry Whisky
by Kevin Chambers-Paston September-16-2014
A great way to use up fruit picked from the hedgerows. Decanted into small bottles, this would make excellent Christmas presents too!
Ingredients
600g blackberries
300g sugar
70cl bottle whisky
Instructions
1. Pour the blackberries and sugar into a sterilised jar and then pour over the bottle of whisky. The jar will need to be at least 2l to hold everything.2. Close, making sure the jar is sealed well and give the jar a good shake to dissolve most of the sugar. Don't worry if some doesn't dissolve straight away, it will do in time.3. Leave in an accessible place for at least once a month, shaking at least once a day to ensure you draw all of the flavour out of the blackberries into the whisky and dissolve all the sugar.4. Pass through a muslin to remove all the pieces of blackberry and decant into a large bottle or several smaller bottles for presents. The fruit can be used to make jams or chutneys and will taste wonderful!
Details
Prep time: Cook time: Total time: Yield: 800ml-1l finished whisky, plus some boozy blackberries
With the rest of the foraged fruit, I intend on making a hedgerow jelly to spread on toast or serve with roasted meats. Watch this space for the recipe and pics!
Last week I spent a couple of days in Scotland for work. Whilst I was there, I met up with fellow bloggers +Jac of Tinned Tomatoes and +Stuart of Cakeyboi. It was awesome to meet them and enjoy a lovely dinner; they are my inspiration for this recipe!
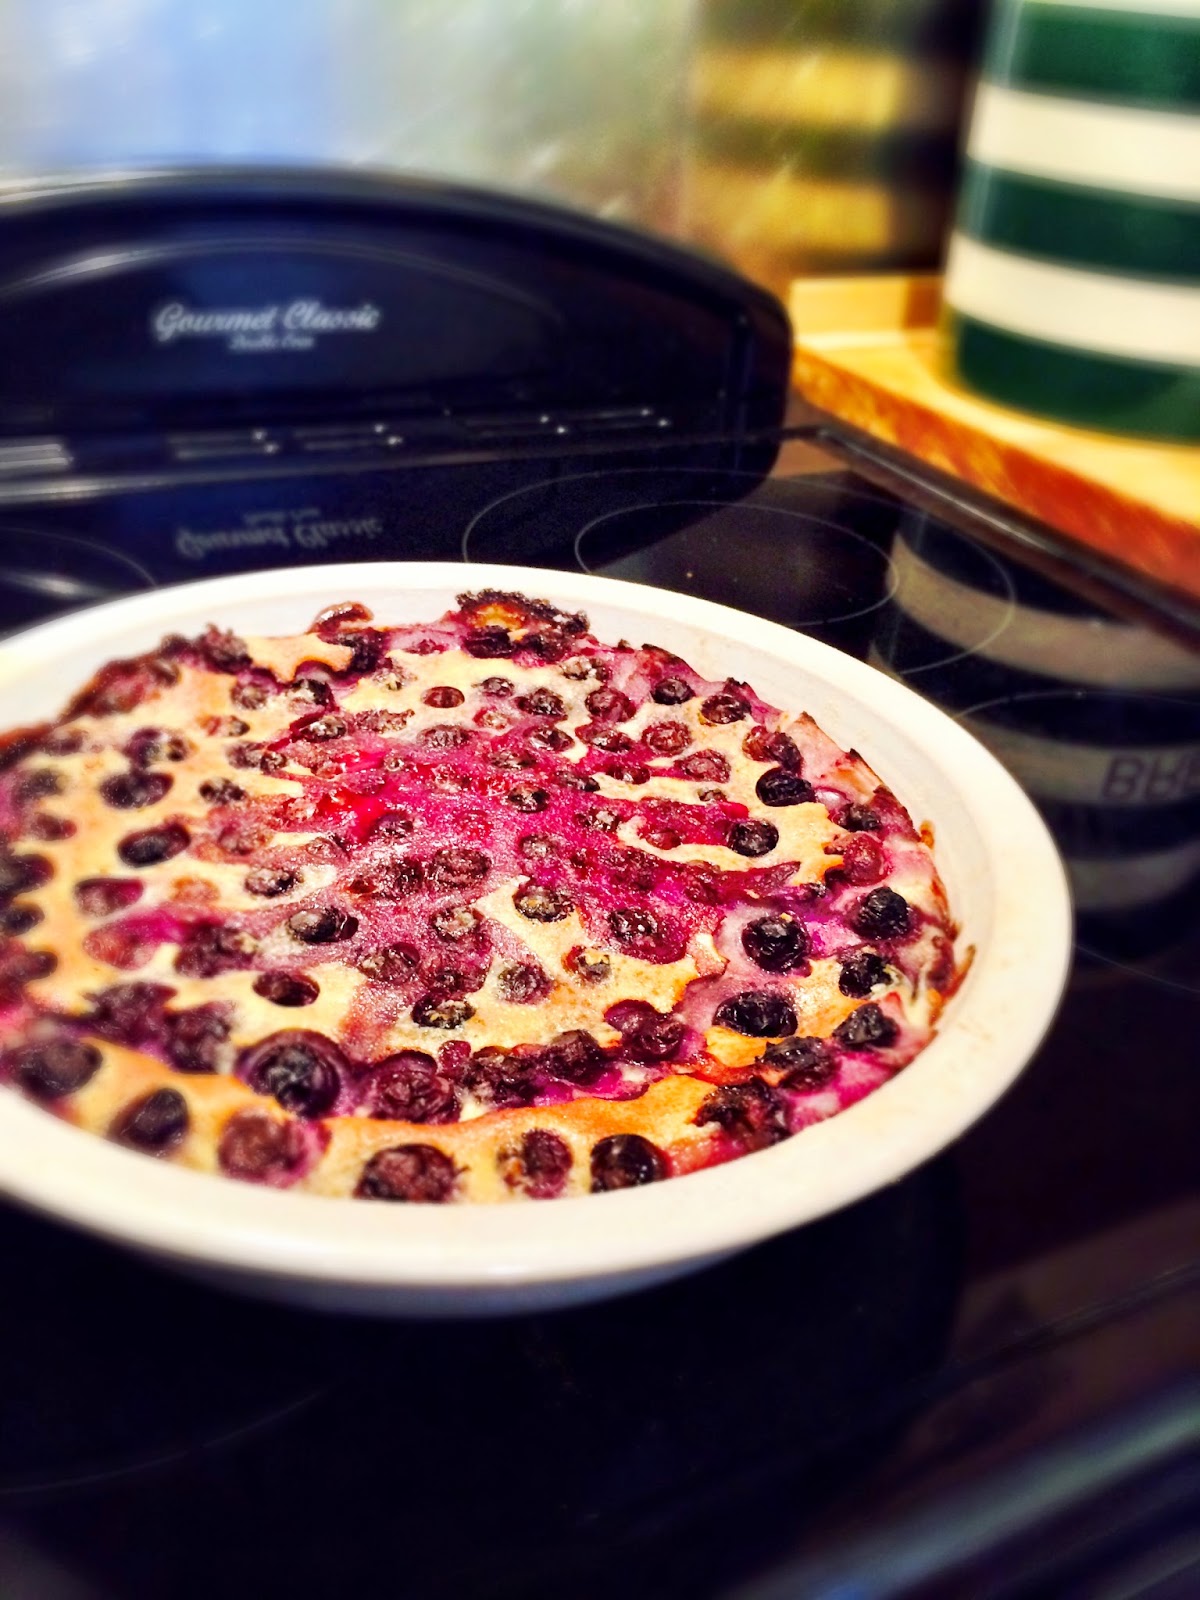
You see, Cakeyboi recently posted a recipe for Custard Cream & Bourbon Biscuit Truffles and I was really impressed with how easy it looked and how impressive the end results were. So, when the nice cabin crew handed me a Tunnock's Caramel Wafer on my flight home, the idea for these truffles hit me.
If you've never had a Caramel Wafer before, you are missing out! These are lovely layered biscuits with caramel that are coated in chocolate. Here, I've smashed them up, added a bit more caramel and coated in chocolate.
I used my Optimum 9400 to blend up the caramel wafers for this recipe, but you could use another blender, food processor or just smash them up with your hands. As long as they are broken up fully, it doesn't matter how you get there!
I used Wilton Candy Melts to coat my truffles as this doesn't need tempering like chocolate does and sets nice and quickly. Some people prefer the purity or the taste of 'real' chocolate though, so feel free to substitute.
I am so excited about the idea of making truffles from smashed up food... I have lots of ideas I want to try. I also need to make these wonderful Cheesecake Truffles from Cat at Two Pigs in Blankets.
Here's how to make these wonderful treats...
print recipe
Scots' Caramel Wafer Truffles
by Kevin Chambers-Paston September-15-2014
These little truffles are made from crushed Tunnock's Caramel Wafers. A real taste of scotland.
Ingredients
3 Tunnock's Caramel Wafers
Around 2 tbsp caramel
100g white candy melts
100g dessicated coconut (optional)
Instructions
1. Blend/break/smash the caramel wafers until they are a fine powder and add the caramel, mixing until combined.2. Using your hands, take a small amount of the mixture and squish together really well. If it's not sticking together, add a bit more caramel. Roll into neat truffle-sized balls and place on a baking tray then into the fridge for 30 minutes to harden.3. Whilst the balls are chilling, toast half of the coconut in a dry pan over a medium heat. Watch it and stir constantly until it reaches a nice golden colour then pour into a bowl and add the rest of the white coconut for contrast.4. Once the balls are chilled, remove from the fridge and give them a quick roll to make sure they are nice and round. Melt the candy melts in the microwave or in a bain marie as per the packet instructions.5. Dip the truffles into the melted candy melts with a fork and place back on the tray once coated. For the coconut truffles, coat and then dip into the bowl with the coconut. Using the fork, push these around the bowl until completely covered and then place on the baking tray.6. Pop these back in the fridge for another 10 mins or so to set completely, then ENJOY!
Details
Prep time: Cook time: Total time: Yield: 10-12 truffles
For more sweet treats, take a peek at my board on Pinterest...
I recently joined a Facebook group called the 'Baking Boy Bloggers'. As the name suggests, we are a group of male bloggers who love to bake and we also love to find new ways of supporting each others' blogs.
So, we have a monthly challenge where one person decides a theme and the others all bake something along that theme and we all link back to each other so our readers can see all of the wonderful creations!
This month the theme is 'meringue' and I decided to think outside the box. Rather than something with meringue on top or a bake consisting completely of meringue, I decided to be a little different and develop a recipe which uses bought meringue nests.
Having watched 'Sweets Made Simple' on the TV recently, I have been craving fudge! So, I came up with this super quick and easy version which is also pretty delicious (even if I say so myself!)
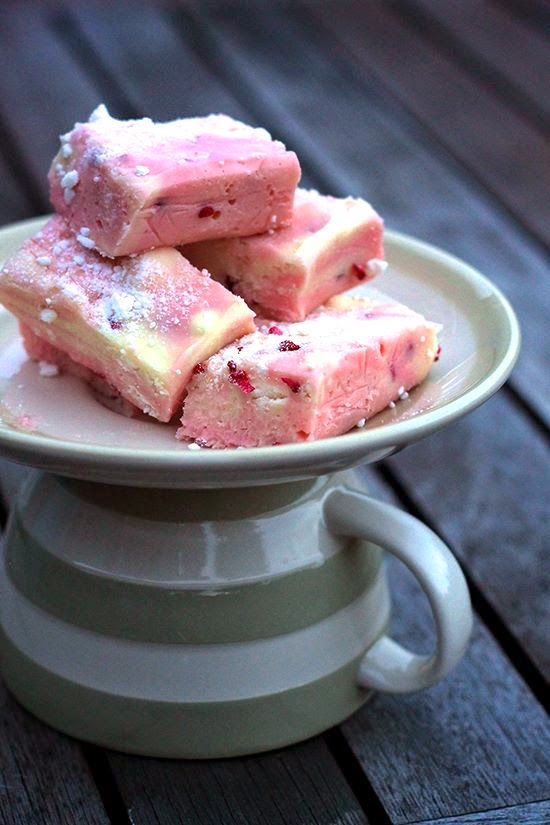
Inspired by a classic Eton Mess, this fudge contains broken meringue pieces, white chocolate and freeze dried raspberries. Yum!
OK, so I know it's not a REAL fudge in the traditional sense and is not made in the same way, but it's so much quicker and easier than boiling it all up with sugar thermometers and then beating until your arms fall off! Give it a go, you might never make 'traditional' fudge again :)
So, here's how to make your own Eton Mess Fudge...
print recipe
Eton Mess Fudge
by Kevin Chambers-Paston September-8-2014
This recipe will show you a really quick and easy way to make fudge. It's slightly softer and creamier than making it the traditional way, but just as delicious!
Ingredients
1 tin (397g) condensed milk
500g white chocolate
3 meringue nests
5g freeze dried raspberries
1tsp raspberry flavouring
A few drops of pink food colouring
Instructions
1. Break the chocolate up and place in a bowl with the condensed milk. Put into a microwave for 30-sec blasts until the chocolate is almost all melted. DO NOT overheat it, or it will separate and you will end up in one big mess!2. While the chocolate is melting, crush the meringue nests leaving some large-ish chunks for texture. Put about 1/2 nest to one side; this will be sprinkled over the top of the finished fudge.3. Once the chocolate is melted, beat with a spoon or spatula for a few seconds until the mixture is smooth and silky.4. Mix in the meringue pieces and freeze dried raspberries along with the raspberry flavouring until combined.5. Transfer half of the mixture into another bowl and add the pink food colouring until the desired colour is reached.6. Add the pink mix back to the rest and swirl around. Don't mix too much, you want a nice marbled colour here.7. Pour the mixture into a tin lined with cling film (around 8"x8" should do it) and sprinkle with the reserved meringue and some extra raspberry pieces. Place in the fridge for at least 2 hours or until set.8. Cut up the pieces and serve at room temperature. You can store this for a few days in the fridge in a sealed container too!
Details
Prep time: time: Total time: Yield: 25-30 pieces
Here are the links for the other Baking Boy Bloggers meringue recipes...
It's the time of the year when pears are beginning to ripen on the trees, which also happens to be the time of year it's starting to get a little colder and I fancy a little spice in my cakes. With this loaf cake, I've put those two together and turned them into a pear and ginger treat!
Rather than just make a cake, I whipped up a quick crumble topping and I am so glad I did. It adds a lovely crunchy layer on top; delicious.
This cake is great just with a cup of tea in the afternoon, but it really comes into its own when warmed and served with ice cream or a dollop of creme fraiche. We had some for dessert this evening and it was superb.
There is a lot of pear in this recipe and pear is reasonably wet. Whilst I take precautions to try and stop the fruit from sinking too far, it is somewhat inevitable so don't worry if the fruit sinks to the bottom, it will still be great. It also means the cake is very moist but I'm not complaining about that one...
A little note about measurements on this blog... You'll notice that I don't stick to imperial or metric; rather, I use a combination of the two. For general recipes I tend to use metric measurements because that makes it much easier when shopping in the UK for ingredients but you'll see that for many cake recipes, such as this one, I'll use imperial. Somehow, imperial measurements just lend themselves to cakes in my head; probably because my mum always used (and still uses) imperial measurements and I remember well my mum making cakes when I was a child. I can still conceive the correct quantities better in my mind using imperial so I will continue to use this for cakes. Of course, if you want to you can always convert recipes to metric online fairly easily.
print recipe
Pear and Ginger Crumble Cake
by Kevin Chambers-Paston September-7-2014
A warming loaf cake, with fresh pear and stem ginger. Delicious with a dollop of creme fraiche or with ice cream
Ingredients
7oz Self-raising flour
7oz baking spread
7oz soft dark brown sugar
3 medium eggs
1/2 tsp baking powder
1 tsp ground ginger
2 pears, not too ripe, peeled cored and chopped finely
2 bulbs stem ginger, chopped finely
For the crumble topping:
2oz self-raising flour
1/2oz caster sugar
1/2oz soft dark brown sugar
1oz butter
Instructions
1. Start by making the crumble mix for the top by rubbing the flour, butter and sugars together until they resemble breadcrumbs then set aside until required.2. Measure out the flour, then remove 3 tbsp and sprinkle over the chopped pears and ginger then mix until the fruit is completely coated. This helps to stop them from sinking.3. Add the rest of the cake ingredients, apart from the pears and stem ginger, to the flour and mix well until completely combined. Fold through the pears and ginger, ensuring they are well distributed.4. Transfer the mixture to a prepared loaf tin (I spray with bake release and sprinkle with flour to prepare my tins) then pour the crumble topping over, completely covering the mix in the tin.5. Bake at 160ºC for 60-80mins or until a skewer pierced into the cake comes out clean and the cake springs back when lightly pressed on top.6. Leave to cool in the tin for 15 mins and then turn out onto a cooling rack. Leave to cool completely before slicing.
Details
Prep time: Cook time: Total time: Yield: 1 loaf cake
Check out my Pinterest board for more loafy goodness...