Tuesday, 24 February 2015

Black Forest Brownies

So, last week here in the UK was Shrove Tuesday, which is also known as 'Pancake Day!' Whenever we have pancakes, I have to have one with lemon and sugar, another with bananas and cream and then my absolute favourite is one with cherries and cream.

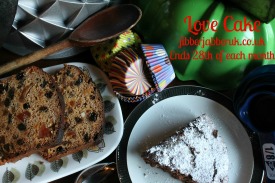
This time of year, cherries are best from a tin so that's what I used. The only problem is, I only actually used a few cherries out of the whole tin! As the week went on, I became more and more aware of these cherries sitting in a tub in the fridge and decided I MUST make something with them. Add in the leftover cherry cocoa powder from my Crackles last week and these brownies were born!


Filled with the chopped cherries, flavoured with cherry cocoa powder and topped with a black forest frosting, these are anything but boring leftovers! Everyone who's eaten one has told me how delicious they are, but don't just take my word for it, give them a go and see for yourself...

If you'd like to know more about the cocoa powder and icing sugar, take a look at this post.

print recipe

Black Forest Brownies
A twist on the classic chocolate brownie, made extra tasty with chopped cherries and a delicious frosting.

Ingredients
  • 3 medium eggs
  • 275g golden caster sugar
  • 200g milk chocolate
  • 185g butter/baking spread
  • 100g plain flour
  • 40g cherry flavoured cocoa powder
  • 1 can black cherries, rinsed, dried and chopped into quarters
  • For the frosting:
  • 100g unsalted butter
  • 150g black forest flavoured icing sugar
  • Instructions
    1. Warm the chocolate and butter together in a microwave at a low setting until melted completely and set aside to cool down slightly. 2. Next, crack the eggs into the bowl of a mixer and add in the caster sugar. Beat the two together until the mixture doubles in size and becomes pale and frothy. Pour in the chocolate and butter mixture whilst mixing slowly and combine fully.3. Sift in the flour and cocoa and fold into the mixture, taking care to avoid knocking the air out. Add the cherries at the last minute and give the mixture a couple of turns to distribute them throughout.4. Pour into a prepared brownie tin and bake in the oven at 180ºC for 20-30 mins or until golden brown on top and mostly cooked inside. (Everyone has a different preference for their brownies, cook a bit less for a gooey centre and a bit longer for fully-cooked throughout.)5. Once baked, remove from the oven and allow to cool in the tin fully.6. Make the frosting by beating the butter and icing sugar together until light and fluffy.7. Cut into pieces, top with the frosting and scatter on any sprinkles you like; I used white chocolate stars. Enjoy!
    Details
    Prep time: Cook time: Total time: Yield: 12 brownies.

    For more tray-baked goodies, check out my board on Pinterest:

    Follow Kevin Chambers-Paston's board Tray all your bakes on me! on Pinterest.

    I'm entering these brownies into the following blog challenges:


    For more great chocolate brownies, check out:

    Sunday, 15 February 2015

    Choc Cherry Bakewell Crackles

    So, the next major 'event' in the diary is Mother's Day here in the UK. With that in mind, the nice people over at Sugar and Crumbs set me a challenge to design a recipe using their products suitable for this special day and here's what I've come up with!


    I started off thinking about things my mum would like to receive as a gift, and therefore what she really likes. She is a complete chocoholic so I knew whatever I made should contain chocolate or cocoa and she also loves a nice cup of tea. So, I was pondering ideas of chocolate things that can be eaten with a cup of tea and these little biscuits were born!

    The pretty crackle effect on the top comes from rolling the cookie dough in icing sugar before baking. As they bake, the cookies spread out but the icing sugar doesn't and this results in the random cracked pattern. I really love how striking the chocolate dough looks against the bright white icing sugar and I will definitely be using this technique again in the future.


    Sugar and Crumbs sell a variety of baking products, but probably their most famous is flavoured icing sugar. Using only natural flavours, they've created a product which means you can have a flavoured sugar without having to worry about adding in chemicals and e-numbers and without having to add extra liquid to your baking. They also make flavoured cocoa powder which is what I've used in these biscuits.

    I'd heard a lot of good things about these products already and I am very pleased to say they definitely live up to the hype. They have strong but delicious flavours and replacing either the cocoa or the sugar in a recipe is plenty for the whole bake to be very well flavoured. I really love the packaging too; strong plastic pouches with resealable tops. Perfect for storing in my baking cupboard.

    The only slightly negative comment I have is that the resealable strip on my bag of cocoa has come unstuck from the bag on one side, so it now doesn't seal. However, the others are fine so I'm inclined to think this is just bad luck. It's certainly not the end of the world!


    So, here's the recipe for you so you can make these for your mum this Mother's Day!

    print recipe

    Choc Cherry Bakewell Crackles
    These little chocolate biscuits are perfect with a cup of tea or coffee as a little sweet treat. Tie up a few in a pretty bag for a really tasty gift!
    Ingredients
  • 60g butter or baking spread, at room temperature
  • 250g golden caster sugar
  • 160g plain flour
  • 1 tsp baking powder
  • 60g Sugar and Crumbs chocolate cherry cocoa powder
  • 2 medium eggs
  • 1 tsp almond extract
  • Sugar and Crumbs cherry bakewell icing sugar
  • Instructions
    1. In a food mixer or in a bowl with a wooden spoon, cream the butter and sugar together until pale and soft.2. Add the rest of the ingredients except the icing sugar and mix together until a ball of dough is formed. If using a mixer, you may have to knead the dough with your hands for a few seconds until it all comes together. Wrap in cling film and refrigerate for at least 1 hour.3. Preheat the oven to 180ºC. Whilst the oven is heating, divide and roll the dough into 32 balls then roll these in a bowl of icing sugar to coat completely. Place on two baking trays lined with parchment but DO NOT flatten the balls at all. They need to still be round when they go into the oven or they will not crackle very successfully.4. Bake for 8-12 minutes, or until done. You can tell when these are done as the inside of the cracks will look dry and dull, rather than wet and shiny.5. Remove from the oven and leave to cool on the tray for 5 minutes then transfer to a rack to cool completely before storing in a cake tin.
    Details
    Prep time: Cook time: Total time: Yield: 32 crackles.

    For more great recipes using the Sugar and Crumbs products, check out these:

    P.S. The mug in the first picture is the work of the super talented Pat Southwood. Doesn't it look great sitting next to my cookies? Check out Pat's site for more of her gorgeous handmade studio pottery.

    Disclaimer: I received some Sugar and Crumbs products for free to review. As always, I wasn't expected to write a positive review and all views expressed are my own personal opinions.

    Tuesday, 10 February 2015

    GIVEAWAY: Hot Smoking Starter Kit

    After the success of my home-cured and home-smoked bacon, the lovely people of Hot Smoked contacted me to see if I'd be interested in trying out their new Hot Smoking Starter Pack.


    Of course, I was only too happy to receive it and started planning a whole range of smoked food to cook with the help of the pack. It includes wood chips and a smoker box for short, fast smoking of foods such such as chicken, fish and vegetables as well as wood chunks for longer, slower smoking of dishes such as beef brisket. Also included is a brilliant little book which gives a lot of information for beginners to hot smoking and it's all packed inside a great canvas bag which you can use to keep all the bits and pieces together for storage.

    The pack can be used with almost any lidded barbecue; no need to buy an expensive hot smoker, unless you really want to!

    As soon as I received this pack, I knew what I wanted to cook with it; beef brisket. This recipe and method is inside the book but as usual I ad-libbed it a little bit. I took pictures at each stage so I could show just how easy it is!

    I started with a joint of brisket which is usually supplied rolled and tied in the UK. I just untied it and laid it flat, then used my Andrew James Flavour Injector to inject the meat with Dr Pepper. The book suggests using cola, but I've made some great pork ribs with Dr Pepper and decided to give that a go.


    The beef then went in the fridge overnight to marinate and give the Dr Pepper a chance to break down the fibres in the meat; this leads to a more tender and juicy end result.

    I used the indirect grilling method to cook the brisket, putting the hot coals and chunk of wood in one side of a barbecue with the meat over the other side. This means the meat cooks like a conventional oven, rather than heat only coming from below. I also set up the air vents so the smoke passed over the meat, flavouring it on the way.

    Unfortunately, I ran into some issues here. After 2 hours the meat just wasn't cooked; I think my charcoal was old stock in the shop and had been stored in a damp warehouse so it didn't light and/or burn very well. I decided at this point to pop the meat into a low oven to finish it off.

    I don't think the meat suffered at all for it though. The finished brisket was delicious; the rub on the outside was spicy but had loads of flavour. It was gently smoked, with a nice smokey flavour but without being too overpowering. Of course, being cooked low and slow it was very tender too.


    So, what did I serve my beef brisket with? Sweet potato fries and homemade slaw, of course!

    All things considered, I'm really pleased with the results given from the pack and I have only used a little of the rub and one chunk of oak. I still have over 90% of the pack left and I'm really looking forward to exploring some of the other recipes in the book and giving my own spin on them. 

    The instruction book is really informative and gives a lot of the background required to effectively smoke your own dishes. My head is already buzzing with ideas for what to smoke next. Watch this space!

    Having been so impressed by this pack, I was delighted when Hot Smoked said they would provide another pack for one of my lucky readers to win in a giveaway.

    To enter, just leave me a comment to tell me what your favourite smoked food(s) is/are and enter your details into the box below. You can get additional entries into the competition by completing the other activities too! Competition ends next Thursday, 19th Feb.

    PLEASE NOTE: Due to postage costs, this competition is open to entrants in the UK ONLY.

    I look forward to hearing from you and wish you good luck with the giveaway!

    Thursday, 5 February 2015

    Coconut Pancakes

    After making my Coconut Rice Pudding Cakelets I had almost a full tin of coconut milk left in the fridge and couldn't decide what to make with it. Luckily, the lovely Farrah sent me some Moose Maple Butter and I knew instantly what I'd like to make; pancakes!


    The recipe for these is quite a simple one really, I just subbed the milk in my normal pancake recipe for coconut milk and added some dessicated coconut too. The result was a wonderfully coconutty pancake which had a nice sweetness without having to add too much sugar to the batter.


    I used Lucy Bee Extra Virgin Organic Raw Coconut Oil to fry the pancakes. It adds another layer of flavour and browns them beautifully.

    I really loved eating these with the maple butter. It is a lovely sweet hit, with the richness of butter. I can't wait until it's in the shops and I can add it as an essential on my shopping list.


    So, if you'd like to give these little pancakes a go, here's the recipe!

    print recipe

    Coconut Pancakes
    Yummy little pancakes, enriched with the creamy taste of coconut.
    Ingredients


  • 225ml coconut milk
  • 50g sugar
  • 1 medium egg
  • 125g self-raising flour
  • 25g dessicated coconut

  • Instructions
    1. Place all the ingredients in a bowl or food processor and combine until completely smooth and free of lumps. If the batter seems too thick, add a tbsp or so of milk to thin it down.2. Fry the pancakes over a med-high heat with a little coconut oil. They are ready to turn over when bubbles appear on the surface and there is no runny batter on top.3. Serve immediately with toppings of your choice. (I recommend maple butter!)
    Details
    Prep time: Cook time: Total time: Yield: 8-10 pancakes.

    Disclaimer: I received some Lucy Bee Coconut Oil and Moose Maple Butter for free to review. As always, I wasn't expected to write a positive review and all views expressed are my own personal opinions.
    "; n.innerHTML = at; container.insertBefore(n , footer); } } return true; }; document.doAT('hentry');
    Related Posts Plugin for WordPress, Blogger...

    Other interesting websites