Saturday, 31 January 2015

Rainbow Bundt Cake

The weather has been terrible here for the last few days. We've not had any lovely snow like the rest of the country, it's just been rain and freezing winds. Dull.

So, what do you do when you need a little ray of sunshine? You bake, of course; and everyone knows what you get when the sun shines through the rain... RAINBOWS!


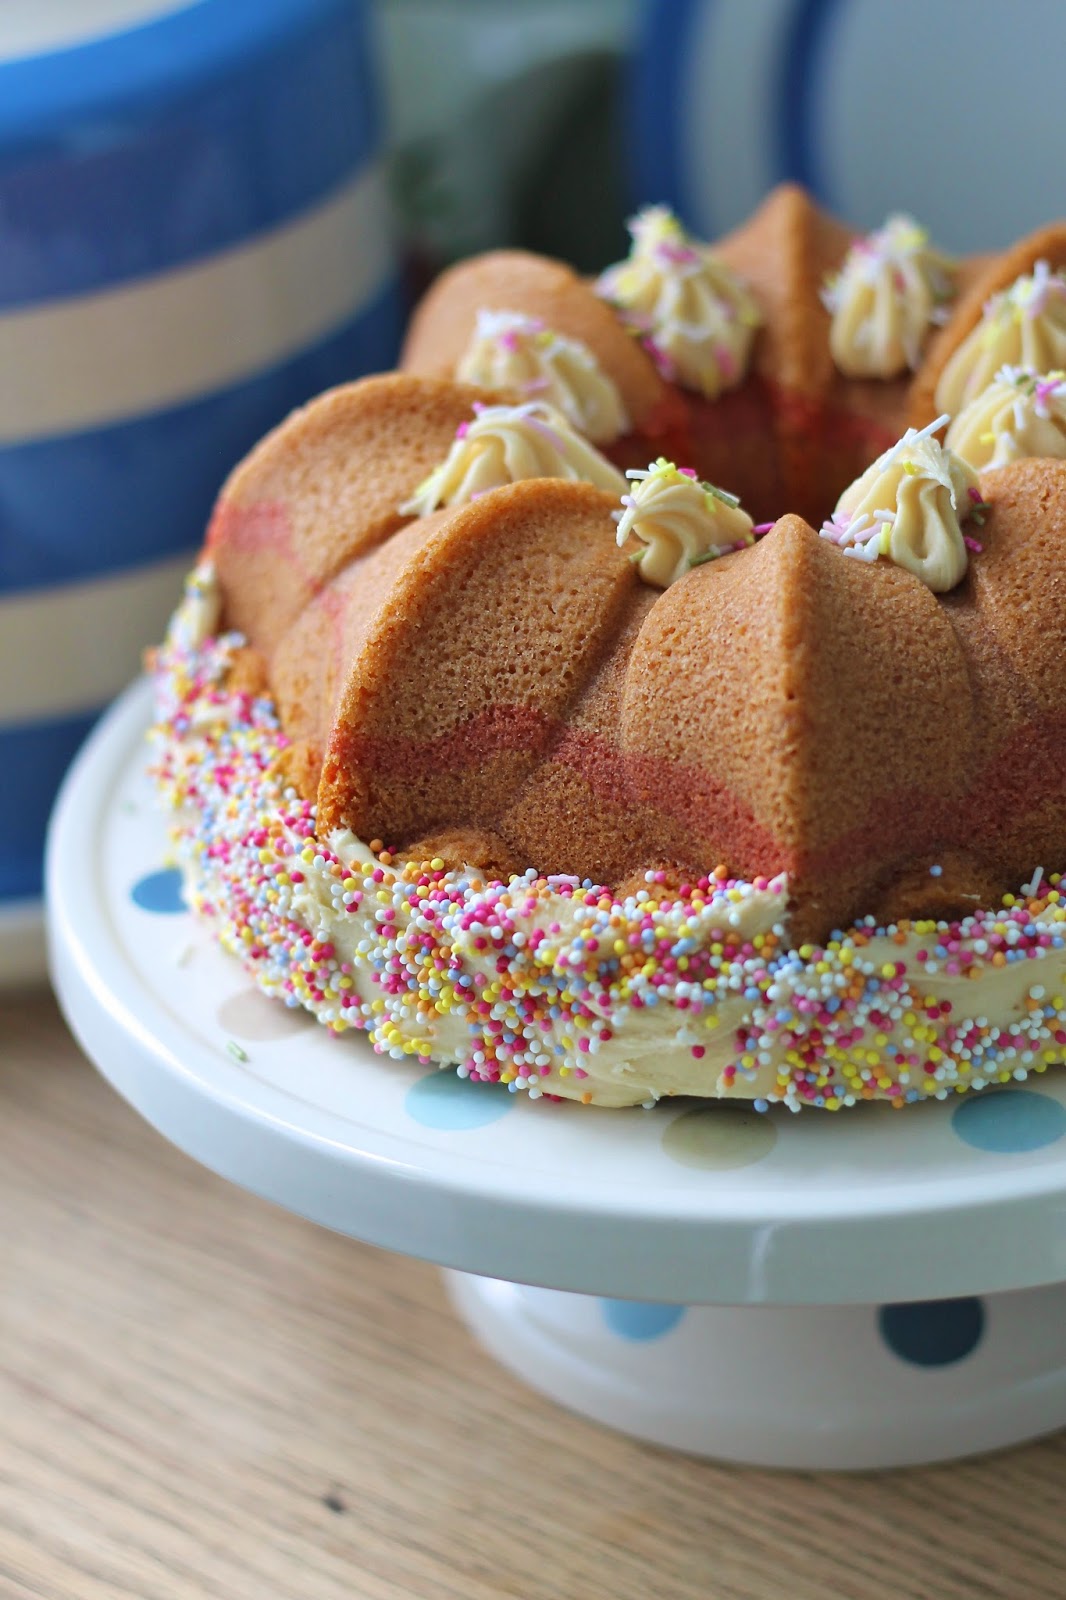
I've always been a fan of those beautiful rainbow layer cakes but I don't really DO big cakes myself... So, I set out to create my own version using something I know very well, a Nordic Ware bundt tin!

OK, so it's not really layered as such but it's definitely multi coloured and there's even a bit of a rainbow shape going on too. I love it.


I've flavoured this lovely cake with Panettone flavouring by Beau and finished with marshmallow buttercream and some deliciously retro 'hundreds and thousands' which I think suit the cake perfectly.

You're going to need to use paste or gel colours in this cake. The liquid ones in little bottles from the supermarket will either appear dull when baked or will taint the flavour and alter the texture of the cake as you'll need to use large quantities. I used the Wilton paste icing colours which I bought from Lakeland, but I believe Asda now sell a range of them too. Sugarflair are the cake decorator's 'go to' but they can be quite expensive if you don't need to use them often. The most 'pure' colouration will come from buying the correct colours in, but you could just buy red, yellow and blue and mix the others up if you want to keep the cost down.

The eagle eyed among you may be able to see that there are some colours missing from my rainbow... I ditched indigo and violet and just tried to mix up a generic purple. It was all going well until I remembered I'm actually colourblind and can't see purple! I ended up with another blue, so Chris tells me, so there's no purple at all in this! Oops!

It does take a lot of time and effort to get the colours right, and there IS a lot of washing up; I think it's completely worth it though to bring sunshine into your kitchen on a dull day.

print recipe

Rainbow Bundt Cake
A delightfully bright bundt cake, with a rainbow inside!
Ingredients
    For the cake:
  • 6 medium eggs
  • The same weight in self-raising flour
  • The same weight in golden caster sugar
  • The same weight in butter or baking spread
  • 1-2tsp natural flavouring of your choice
  • An assortment of paste or gel food colours
  • For the frosting:
  • 75g butter
  • 150g icing sugar (I used golden icing sugar for colour and flavour)
  • 100g marshmallow fluff or marshmallow creme
  • To finish:
  • Assorted rainbow sprinkles!
Instructions
1. In order to bake a perfectly light and airy sponge cake, you need to use equal quantities of eggs, flour, butter or baking spread and sugar. The easiest way to do this is to weigh the eggs and then add the same weight of the remaining ingredients. Place all in a bowl and mix together until combined and smooth. Add the flavouring and stir to incorporate.2. Divide the mixture equally between 7 bowls, adding colouring to 6 of the bowls and leaving the 7th without any colour.3. Once the colours are mixed, start to add them to your greased and floured pan starting with the plain mix. You need to make sure that each layer completely covers the previous one in the tin; I found the best way was to dollop a layer all over and smooth around the tin with the back of a spoon.4. Once all the colours are in, give the tin a few sharp taps on a cloth on the worktop to release any large air bubbles in the mixture. Bake at 160ºC for 45-60 minutes or until cooked through.5. When cooked, remove from the oven and leave to cool for 10 mins in the tin then turn out onto a cooling rack and leave until completely cold.6. For the frosting, just combine all the ingredients with a mixer (or by hand if you're feeling strong!) until light and fluffy and there are no lumps.7. When the cake is completely cold, smear the frosting over as desired and decorate with sprinkles!
Details
Prep time: Cook time: Total time: Yield: 1 bundt cake

Now, who's doing the washing up ?!


For more great recipes for multicoloured cakes, take a look at:

Sunday, 25 January 2015

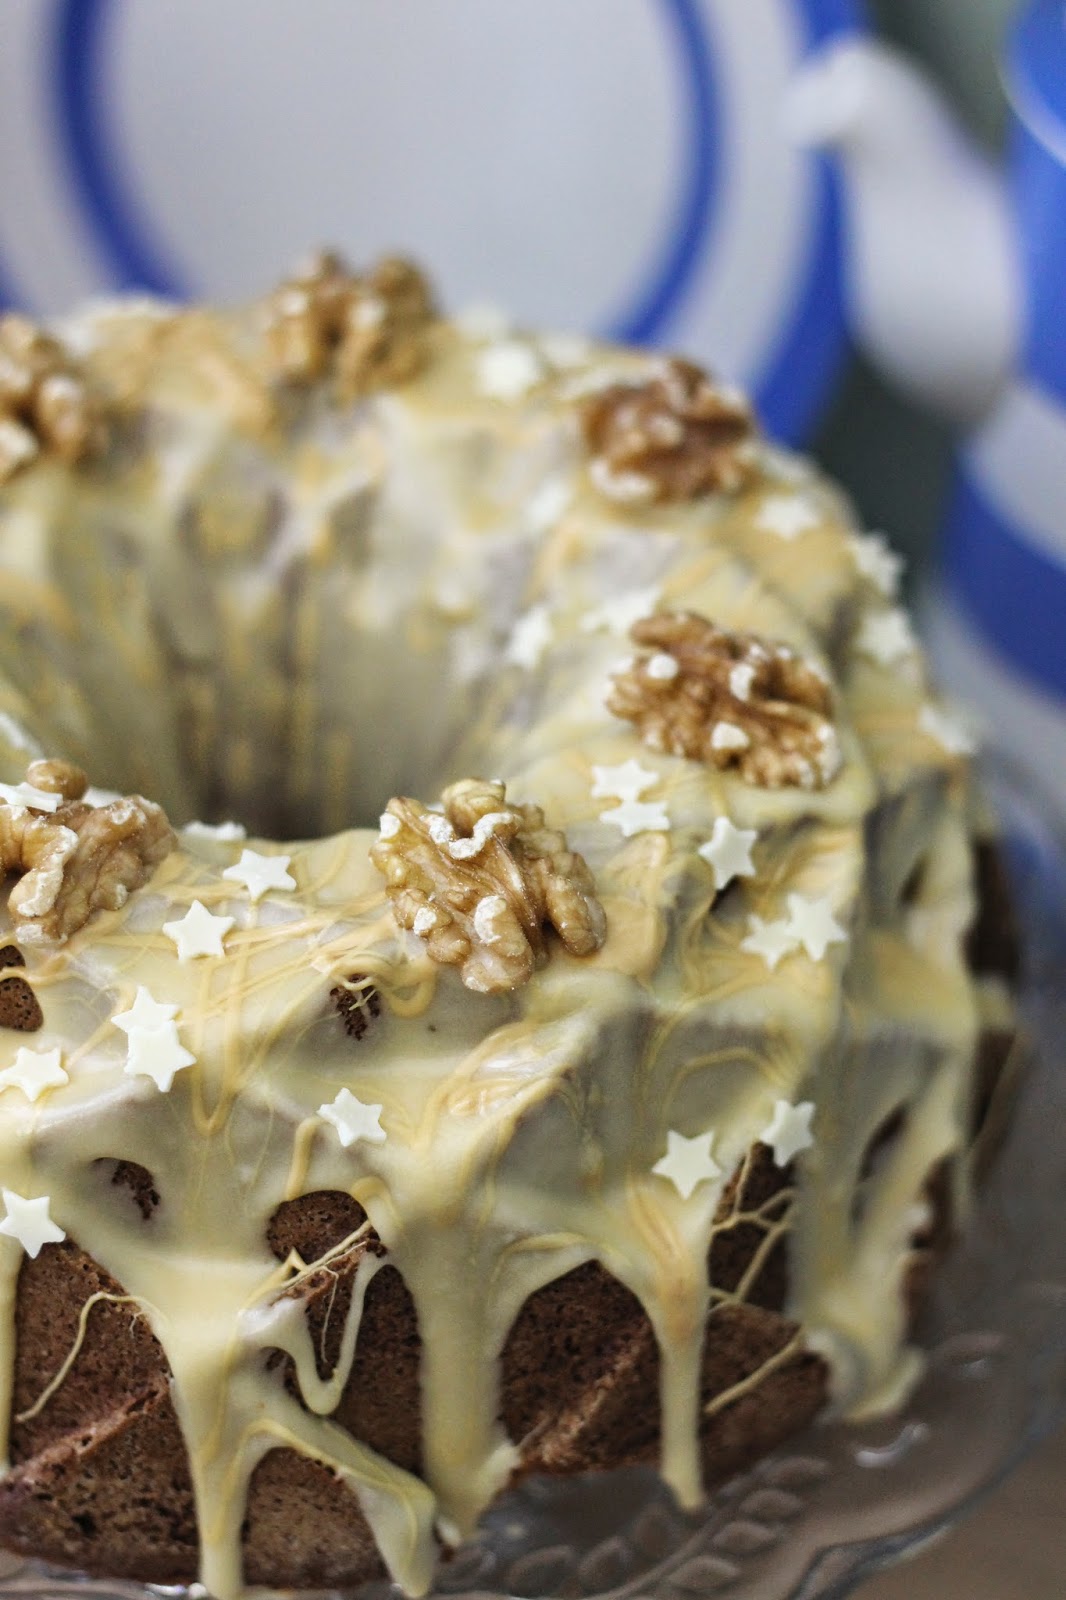
Caramelised White Chocolate & Carrot Bundt Cake

I had a couple of days off work this week as we had the roofing repair man coming to fix the leaking roof. Rain water dripping through the loft, down the light fitting and onto the BED was not my idea of fun!

So, as always, days off meant time to play in the kitchen! At some point last weekend, I'd stumbled across this The Little Loaf's Caramelised White Chocolate Brownies and was fascinated by the idea of caramelising white chocolate in the oven... I could definitely imagine just how good it would taste so when I had a few hours spare I knew what I wanted to try.


All the recipes I'd seen involved putting the chocolate in the oven for at least 50 minutes and having to stir it every 10. That seemed like a lot of work and a lot of wasted energy to me, so I turned to the appliance I usually use in these situations; the slow cooker! 

I put 500g of white chocolate (Sainsbury's Basic!) into the slow cooker, mainly because I wanted a big pot of chocolate to make it worthwhile and also because I was worried a smaller amount of chocolate would catch and have more chance of burning. 

It is super simple to make, just put the chocolate into the slow cooker and leave on low for around 2-3 hours or until the desired colour. I stirred every half an hour just to make sure it caramelised evenly. Don't worry if it seems to 'seize' or go really lumpy, that's normal and a bit more stirring will smooth it out again.


Once cooked, I just piled it all into a jar and left to solidify again. Now, the chocolate will no longer be tempered so it may 'bloom' and get white marks on it once it's cooled but that's ok and will go again once heated.

So, I had all this white chocolate sitting there but what was I going to make with it? A bundt cake of course! I made up two packets of Wright's Baking cake mix and baked in my Jubilee Bundt pan (such a time saver but oh so delicious at the same time!)


Once cooked and cooled, I mixed together 100g of the white chocolate, 40g butter and 1 tbsp of milk and melted together in the microwave. 200g of icing sugar sifted in turned this into a deliciously thick drizzle to smear all over the cake. I finished it off with some walnut halves and some white chocolate stars! Delicious!


As always, if you make either of these please let me know and remember to take pics! Stay tuned for the next recipe with caramelised white chocolate too...

I'm entering these into the following challenges:


Thursday, 22 January 2015

The Larder List: January 2015

New to The Crafty Larder is The Larder List. A monthly round-up of the products I have been loving or loathing this month. Some were sent to me for free to sample and others I have paid for.


Fruit Broo 

These little tubes are great for people who like fruit teas. Each little tube contains enough concentrate to make 10 drinks and what a delicious tasting drink they are too!

I've also used these to flavour bakes such as macarons etc.

 Price: £1.70 for 10 drinks

 Score: 9/10


Minvita Superfood Powders

These powders are excellent to add to smoothies and juices and provide a boost of flavour as well as nutrition. Although they are quite expensive, they are a 'must have' for all my smoothies now!

Price: Between £10 and £35 per tub, depending on ingredients

Score: 7/10 (due to price)


Lucy Bee Coconut Oil

There is loads of information online about the health benefits of using coconut oil. Although these are a bonus, I use it because it is absolutely delicious. Shallow frying, baking, flavouring coffee and more can be done with this lovely oil.

Price: £6.00 for 300ml

Score: 9/10


Pret a Manger: Love Bar Latte

Anyone who knows me knows that I am a bit of a coffee fiend. Whilst waiting in the queue one day for a morning 'fix' I noticed this tempting Love Bar Latte. It has a delicious chocolatey, caramely, biscuity flavour with a nutty after-taste too. Perfect for a morning sugar and caffeine hit.

Price: Unsure!

Score: 8/10


Peanut Hottie

Ever tried to make a hot chocolate with peanut butter instead? You'll pretty certainly end up with an oily, clumpy mess. It's really disappointing when you KNOW if it could work it would be delicious...

The makers of Peanut Hottie realised this and made an instant "just add water" drink from peanuts with the fat removed. Genius! It is so scrummy too.

Price: £3 for 260g 

Score: 10/10 !


Mediterranean Tomato Chutney

I was sent some of this to try before Christmas and it was a really welcome addition to our cheese boards. A little runnier than most chutneys, it spreads really well and tastes good too.

Price: £1.50 for 290g

Score: 7/10


Pastinos

These little crisps look like they are made from potato but they are actually made from PASTA! I know it sounds CRAZY but they are packed full of flavour and really crunchy as a result. I've not tried a flavour I didn't think was delicious.

Price: £2.19 for 150g

Score: 9/10


Nakd Bars

I'd seen these little bars around all over the place but was always put off by the fact the main ingredient is usually dried dates. Remembering back to Christmas when I was a child eating those dried dates with the stones in the middle, I was not convinced.

However, I tried one and I was hooked right away. There are so many flavours to choose from, you're sure to find one you like. I think the best is the Cocoa Orange!

Price: Varies, 50p-£1 per bar usually

Score: 10/10 !


Lots of great scores for our first month of The Larder List. I wonder what February will bring?

Sunday, 18 January 2015

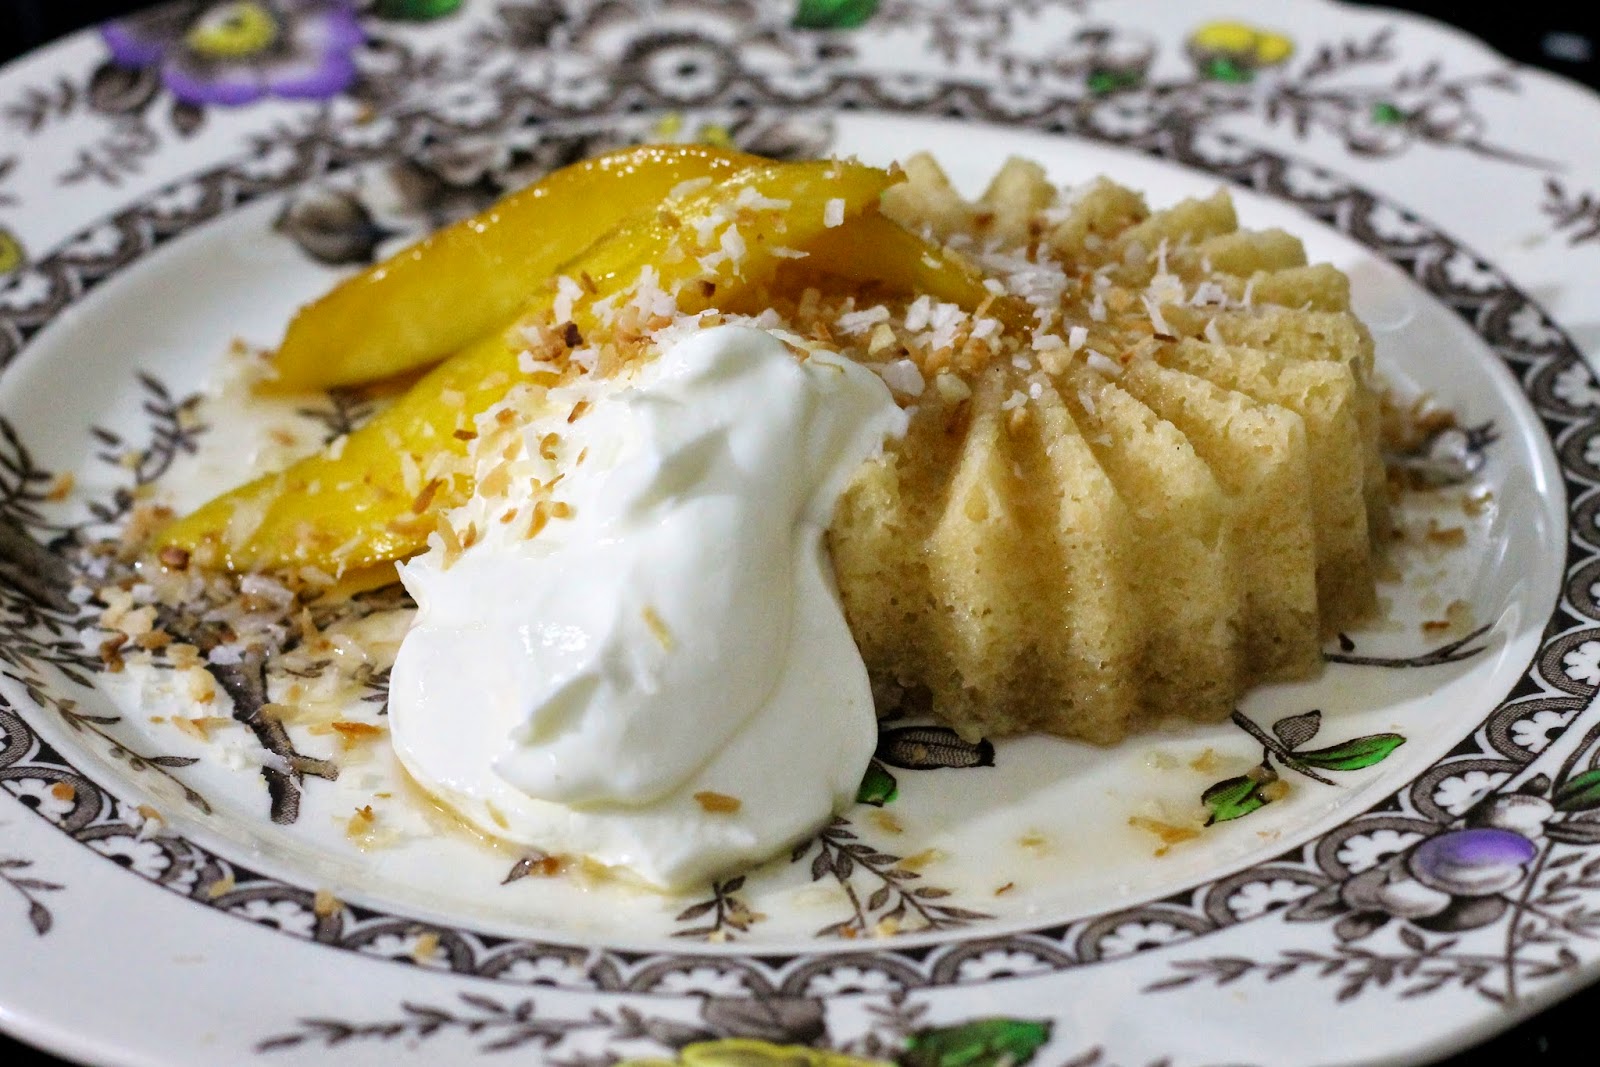
Gluten-Free Coconut Rice Pudding Cakelets

You may recall me saying when making my Whisky and Ginger Bundlettes I had some mixture left over and nowhere to put it! Well, the wonderful people from Nordic Ware came to my rescue and sent me a fantastic Ruffled Medallion Cakelet pan, in the hopes I would always have somewhere for left over cake batter in future. However, I decided right away that this pan was far too special to be used just for left overs. I had a bit of a think and these little cakelets were born!


I decided I ought to try my hand at gluten-free baking. We have a couple of friends who are gluten intolerant and the best I could offer them was a standard cake with the flour swapped out for a gluten free flour mix from the supermarket. Although edible, those cakes never turn out as well as the ones using wheat flour so I wanted to make something that would be even BETTER because it's gluten free.

I spoke to the lovely Howard Middleton (the charismatic baker from GBBO '13) on Twitter and he told me that rice flour is a good flour to use in cakes when combined with coconut and a little xanthan gum for texture. I was instantly reminded of my Coconut Rice Pudding which combines pudding rice with the flavour of coconut into a delicious dessert. I quite often pair this with some mango slices poached in a rum-spiked syrup so I set about creating this flavour combo in my gluten free cakelets.


I made my own pudding rice flour by whizzing up pudding rice in my Optimum 9400 blender for 30 seconds. It worked perfectly and I had a flour that I KNEW would taste like rice pudding! If you don't have an Optimum 9400, you could always use store bought flour.


Rather than using butter in these cakes, I used some delicious Lucy Bee Extra Virgin Organic Raw Coconut Oil. This is simply divine and a fantastic ingredient in baking. As well as adding a great flavour, this coconut oil has a bunch of health benefits too; just have a quick browse online if you'd like to know more. You'll also notice I use less coconut oil than you may do with other fats; this is because it contains no water unlike butter meaning you don't need to use as much which can also mean a few less calories!

Included in my syrup is a generous splosh of rum; I used a delicious Ron Miel (Honey Rum) my parents bought me when out in Tenerife but I'm sure any rum would be delicious.


As you can see, I couldn't resist for long before I HAD to tuck into one. They are absolutely delicious and I think SO much better for being gluten free and having rice flour in!

print recipe

Gluten-Free Coconut Rice Pudding Cakelets
Delicious little gluten free cakes, perfect for afternoon tea or a dessert when combined with rum-spiked mango and creme fraiche.
Ingredients
  • 4.5oz rice flour
  • 2oz dessicated coconut
  • 6oz caster sugar
  • 4.5oz coconut oil
  • 3 medium eggs
  • 3-4tbsp coconut milk
  • 1tsp xanthan gum
  • 2tsp gluten-free baking powder
  • For the poached mango (optional):
  • 1 mango, skin and stone removed and cut into slices
  • 0.5cup sugar
  • A large splosh of rum
  • To serve:
  • Creme fraiche
  • a mixture of toasted and untoasted dessicated coconut
  • Instructions
    1. Prepare the tin and preheat the oven to 160ºC.2. Place all of the cake ingredients into a mixing bowl or the bowl of a stand mixer and beat together until fully combined. Don't worry if the mixture looks a little bit gelatinous, this is caused by the xanthan gum at this stage but will not affect the finished cakes.3. Spoon into the tin and bake for around 15-25 minutes or until done. Leave to cool for 10 minutes then turn out onto a cooling rack before leaving to cool completely.4. For the mango, simple combine the sugar with 0.5 cups of water and the rum and bring to a simmer. Place the prepared mango in the syrup and poach until tender. Serve with some of the syrup poured on the cakes and a dollop of creme fraiche on the side. Garnish with the dessicated coconut if desired and enjoy!
    Details
    Prep time: Cook time: Total time: Yield: 6 cakelets.

    For more gluten free bakes and desserts, check out these from other bloggers:

    Disclaimer: I received the Ruffled Medallion Cakelet pan as a gift from Nordic Ware and was not expected to review it or write about it at all. I did because, quite simply, I think their products are awesome! I also received some Lucy Bee Coconut Oil for free to review. As always, I wasn't expected to write a positive review and all views expressed are my own personal opinions.

    Thursday, 15 January 2015

    REVIEW: Bill's, Norwich

    The first time I visited Bill's was just after they'd opened here in Norwich and back then I thought the food was really only 'OK'. So, when Chris suggested we go there again last week I can't really say I was looking forward to it much.

    However, I was very pleasantly surprised as you'll see as you read through the review. One point I must mention is the comparison that's quite often drawn between Bill's and Jamie's Italian. They are similar 'feeling' restaurants and they are just round the corner from each other in Norwich, but that's where the similarities end. In terms of the quality of the food, I think Bill's are leagues ahead.


    First Impressions
    On walking into Bill's, I was confronted with a really lively, friendly atmosphere. There seemed to be a nice buzz around the place and everyone was having a good time; always a good start.

    The decor is great. Really quirky and interesting and there are things dotted around for you to buy too, such as teapots and jugs. Despite the fact Bill's is a chain, it had an organic feel about it I really liked too.

    The toilets were clean, but there were watermarks on the walls etc. showing a slight lack of attention to detail. 9/10

    Service
    The waiter was friendly, polite and quick and he didn't grumble when I asked for something that wasn't on the menu. I don't really have much to fault here. 10/10

    The Food
    The first items to arrive to the table were the drinks. I ordered an elderflower cordial which was very tasty and came with half a citrus grove in it too! It's also available hot which didn't appeal to me at the time, but I'm now intrigued and may have to try it this way on my next visit.


    My main was a combination of two items from the menu. The standard burger is available 'naked', without a bun and chips but with a salad and tzatsiki instead. I ordered this but rather than the beef patty I opted for the filling from a halloumi and hummus burger. The waiter was perfectly fine with this and I was really happy with the dish. The only very slight criticisms I could make is that the halloumi was slightly dry and I much prefer a chunky, rustic tzatziki, but I am being really picky here. Overall, it was a lovely dish.


    Chris opted for one of the specials, a rump steak sandwich. I was rather surprised when the waiter took the order as he didn't ask how he wanted the steak to be cooked; a golden rule in restaurants, I thought? It arrived and the steak was medium-well, fine for Chris but overcooked for me. Having said that, I did taste some of the sandwich and thought it was delicious. Each of the fillings complimented the next and the steak was cooked really well. The chips were hot, crispy and not too oily, just as chips should be.


    Bill's lose a couple of points in this section; one for the halloumi and another for not asking how to cook the steak. 8/10

    Value For Money
    Starters at Bill's are around £4-6 and main courses £8-12 with grills and specials being slightly more expensive. I guess this is pretty standard pricing, but for the quality of the food I think it's very good value. 9/10

    Overall
    As you can probably tell, I really enjoyed my second visit to Bill's and I hope to visit again sometime soon. With that in mind, I'm giving them a really well deserved 8.5/10


    Have you been to Bill's in Norwich? Or perhaps in another location? If so, leave a comment below to let me know what you thought!

    Check out The Fry Up Inspector's review of Breakfast at Bill's to! (Many thanks to him for the interior and exterior pics at the beginning of the review too!)

    Sunday, 11 January 2015

    Halloumi, Puy Lentil and Beet Salad

    I never intended for this salad to make it into a blog post. I made it for our dinner last night, inspired by this wonderful Puy Lentil, Beet and Mozzarella Salad made by Jac at Tinned Tomatoes and posted quick snaps of it online. As is often the way, the people of Twitter have demanded the recipe so here it is! Apologies the pics aren't up to the usual standard, but this was never supposed to be here.


    Like the rest of the country, I have been watching what I eat this month so far. Since I started blogging, I've gained almost a stone and a half in weight so I'm making a big effort to get that back down again. With the help of the My Fitness Pal app, plus my new Jawbone UP24 and Fitbit Aria scales, I am pleased to report I am well on the way!


    So, here's the recipe for this super-filling salad. The best bit is that it comes in at under 600 calories per serving too.

    print recipe

    Halloumi, Puy Lentil and Beet Salad
    A protein-packed and delicious healthy salad at under 600 calories per portion.
    Ingredients
  • 225g pack of halloumi cheese with chilli
  • 100g ready to eat puy lentils
  • 350g pickled baby beetroot, drained weight
  • 150g baby new potatoes
  • 1/4 small white onion
  • 1/2 cucumber
  • 80g mixed baby salad leaves
  • 4 tbsp balsamic salad dressing
  • Instructions
    1. Slice the potatoes and put into a pan of boiling water. These will need around 10 mins to boil until tender.2. Whilst the potatoes are boiling, prepare the rest of the salad by chopping the beetroot and cucumber into chunks and slicing the onion very finely.3. When only a couple of minutes remain until the potatoes are ready, slice the halloumi and put into a pan on med-high heat until nicely fried on both sides. Don't worry, it won't melt!4. At the last minute, heat the lentils according to the pack instructions then assemble the salad and top with 2tbsp dressing per plate. Dig in!
    Details
    Prep time: Cook time: Total time: Yield: Serves 2 as a main meal.


    Monday, 5 January 2015

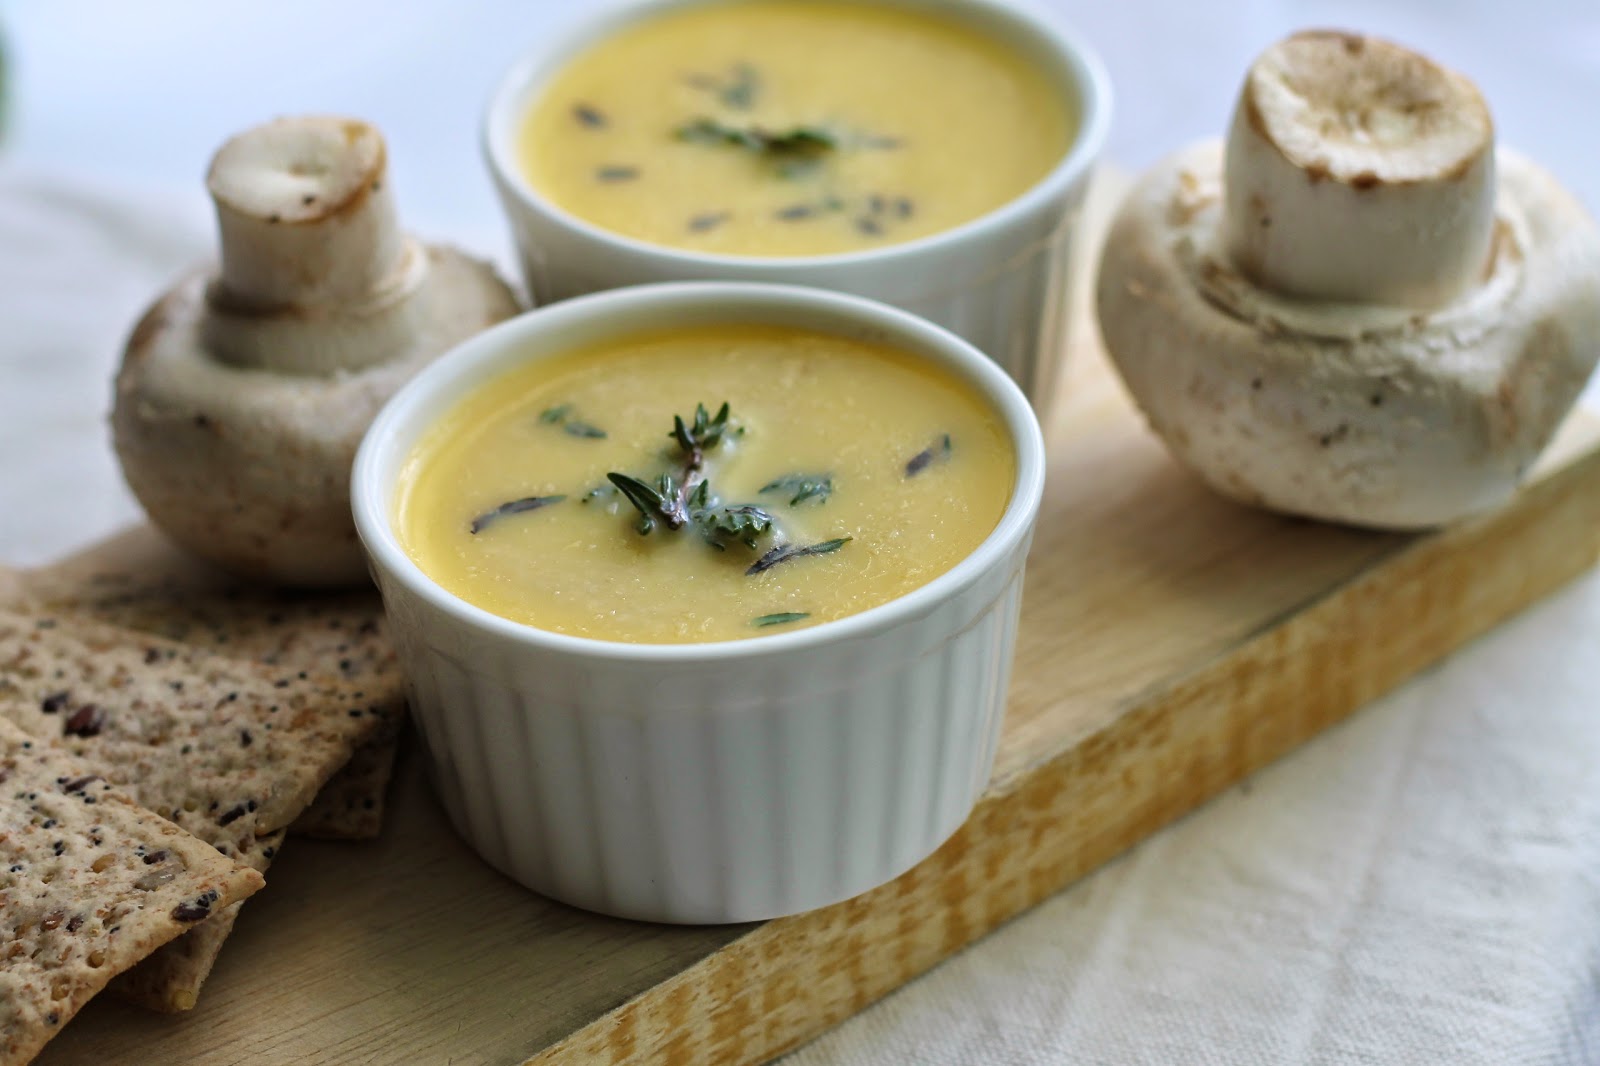
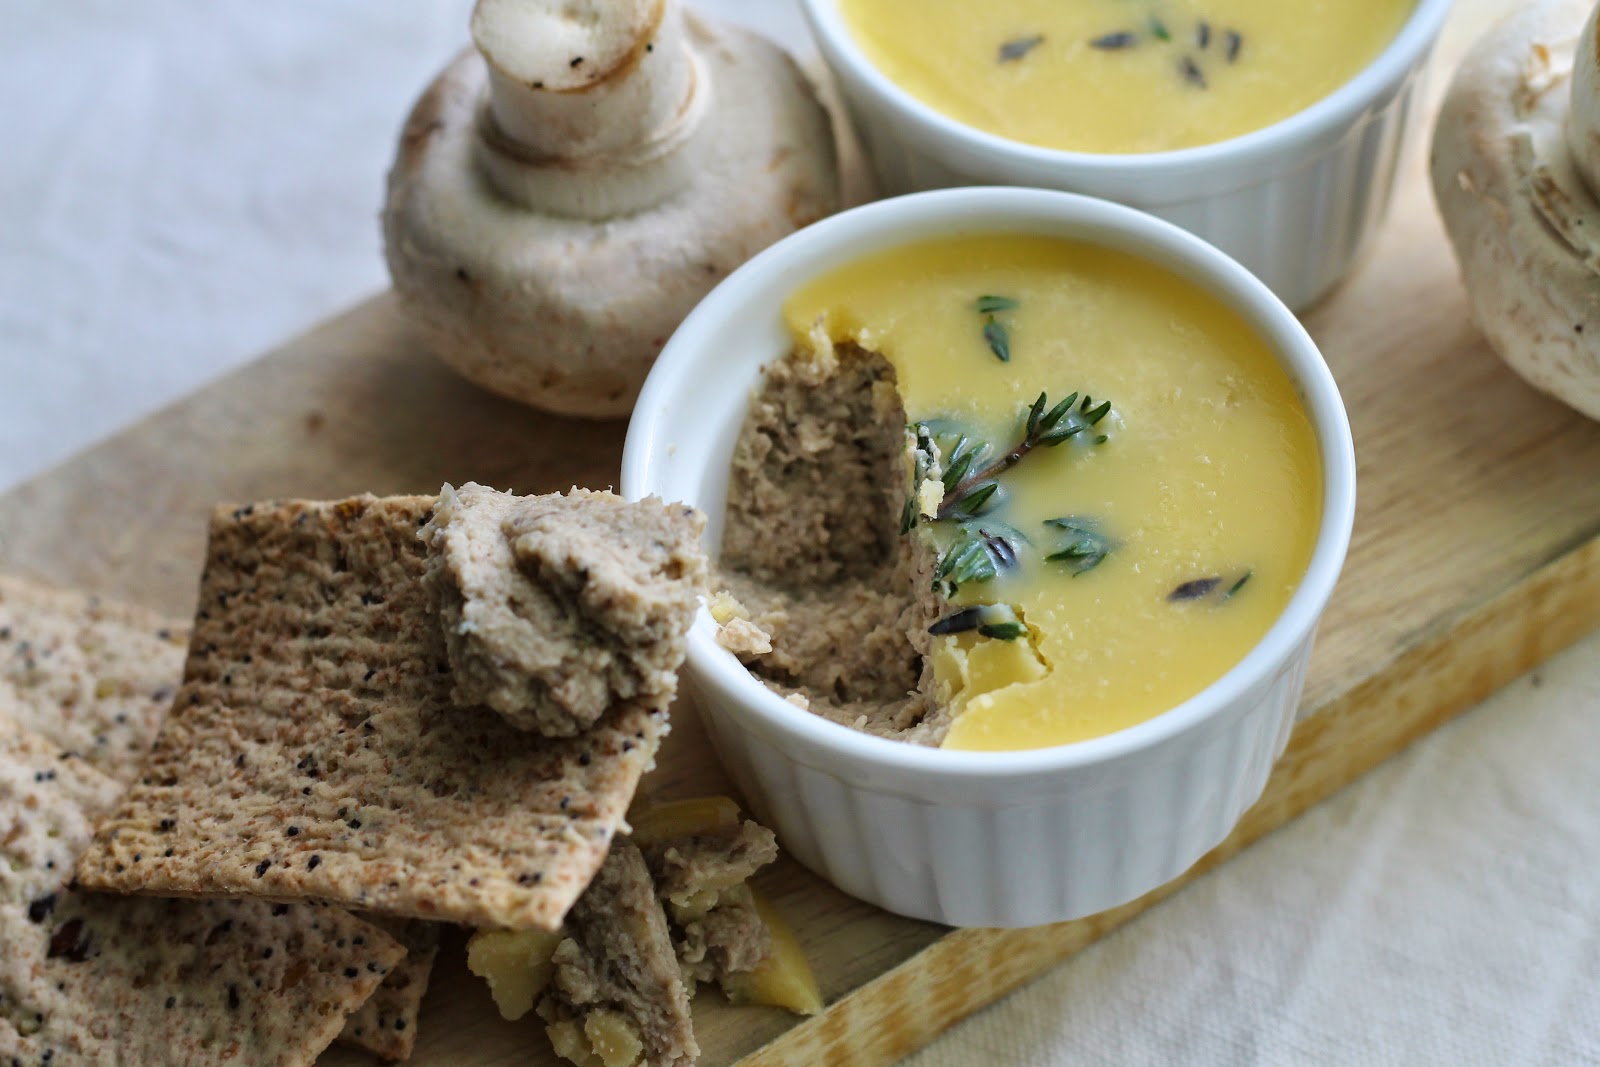
    Mushroom Pâté

    It's good to be back!

    Sorry I've been a bit quiet over the festive period but it has been manic for us. We had 9 over for Christmas dinner in our little house and I think I've been recovering from the ordeal ever since. It was lovely to spend Christmas with family, but it's nice to get back to normality again.

    If you've been a regular reader of my blog you'll probably remember that I really love all things vintage and retro; our Christmas dinner was no exception to this! As the second course (of six!) my guests had a choice of either a retro prawn cocktail or this wonderful mushroom pâté. Some things just work and for me a prawn cocktail is a must for any Christmas dinner. I appreciate that some people don't really like prawns, so I set about creating this mushroom pâté and I'm really pleased with how it turned out.


    Before setting out to make this, I looked at various recipes online. As is common, most of them contained something like 10 ingredients but I wanted something nice and simple. Having never made pâté before, I was a little unsure of where I was going but took a leap of faith and it proved to be delicious after all. Phew!


    I'm sure you can vary the ingredients in this if you would prefer a different herb or would like to leave out the garlic. However, I think mushrooms work brilliantly with thyme and garlic so that's what I went with. You could also use any kind of mushroom you like, depending on what is available and your budget.

    print recipe

    Mushroom Pâté
    A simple yet delicious pâté, makes a delicious starter with some crusty bread or crackers!
    Ingredients

  • 200g mixed mushrooms, I used half chestnut and half shitake
  • 1 small onion, diced
  • A large knob unsalted butter
  • 1/2-1 tbsp fresh thyme, leaves only
  • 1-2 cloves garlic, crushed
  • 2 tbsp cream cheese
  • Around 50g butter and a few thyme leaves, to top

  • Instructions
    1. Fry the onion slowly in the large knob of butter and a small dash of olive oil for a few minutes until soft, then add the mushrooms, thyme and garlic and cook for a few minutes more. Once cooked, leave to cool completely.2. Blend the mixture, together with the cream cheese, until a smooth paste is formed. As always, I used my Optimum 9400 high speed blender for this.3. Spoon into 4 ramekins and level as much as possible using a knife or the back of a spoon. Remember to leave enough space to top with butter.4. Melt the 50g butter and pour over the pâté to seal completely then garnish with a few thyme leaves. Chill for at least 3 hours before serving. Enjoy!
    Details
    Prep time: Cook time: Total time: Yield: 4 servings, as a starter.

    I am entering this recipe into the 'Cooking With Herbs' challenge over at Lavender and Lovage.


    "; n.innerHTML = at; container.insertBefore(n , footer); } } return true; }; document.doAT('hentry');
    Related Posts Plugin for WordPress, Blogger...

    Other interesting websites